9:41 PM

Universal Pad Washer

Posted by Anthony

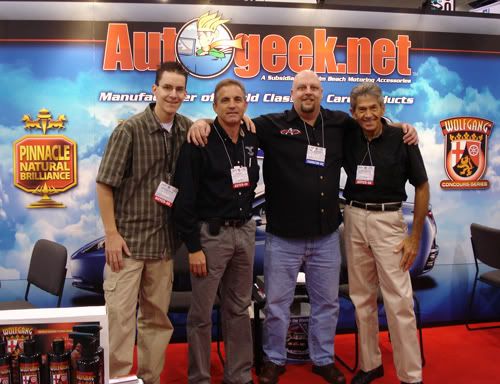
I saw the Grit Guard Universal Pad Washer in use at the Autogeek booth at the SEMA show this year. It seemed like anybody demonstrating polishing products had one at their booth. Autogeek had one at their booth too and I got to hear the inventors of the product talk about it a lot. So I decided it was worth giving it a shot. Holy cow!! Why didn't I get one of these sooner??? This is an absolutely awesome device that is a must have for anyone who uses a machine to polish their vehicles.

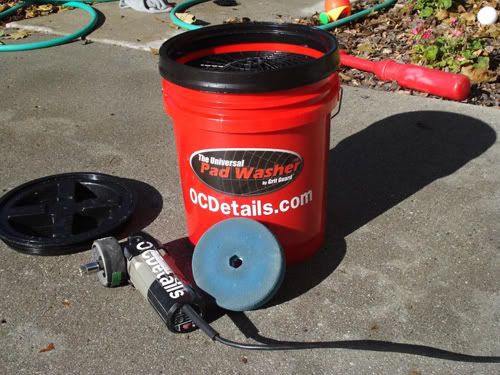
The product actually serves multiple purposes. It is a pad washer, pad dryer, wash bucket, and grit guard all in one. If you take out the center device that elevates the grit guard above the water level then it is a great wash bucket. Put the grit guard in the bottom and you get the added benefit of being able to scrub your mitt before going back to the car to keep washing. And we all know how much of a pain it is to wash out your pad and go back to polishing with it still damp. Spinning it on the highest setting will still only get so much of the water out. So this product is really a very versitile and useful purchase.

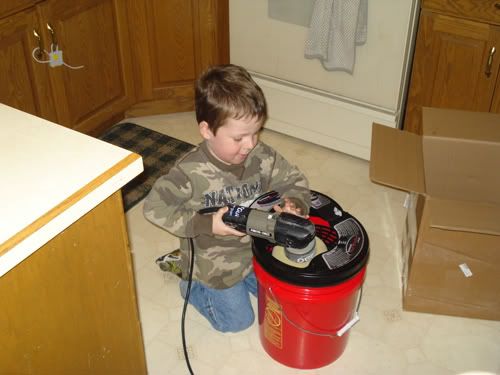
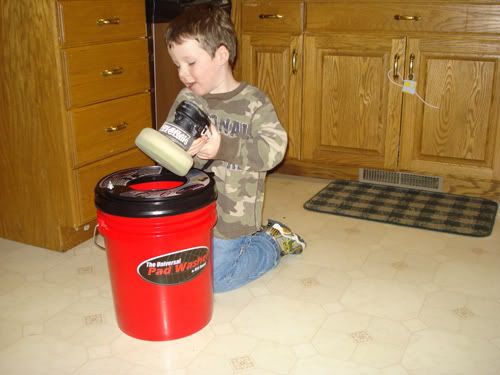
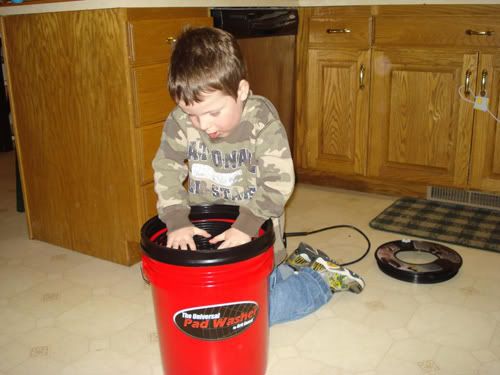
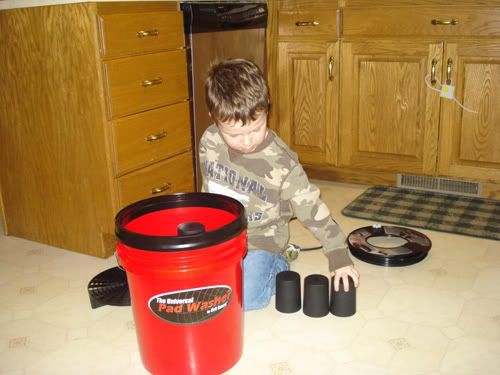
I let my son do the initial inspection and test fitting of everything. It got a big thumbs up from him. The thing I was really curious about is how intuitive this product was. If a 5 year old can figure out how to put it together and understands how to use it, then I am pretty sure anybody will be able to figure it out. ;)


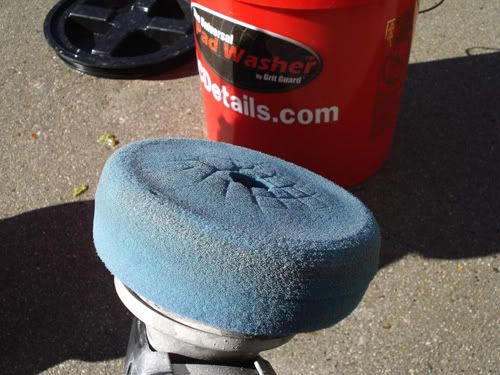
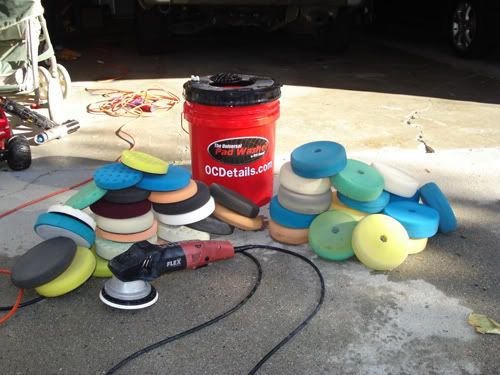
After we got it put together and understood the rules, I put it to the test. It is the end of my detailing season and I had a lot of pads to wash. I rounded up as many as I could find and got ready to clean them. I think I might have missed a few in the garage somewhere... I could have sworn I had a couple more blue ones.


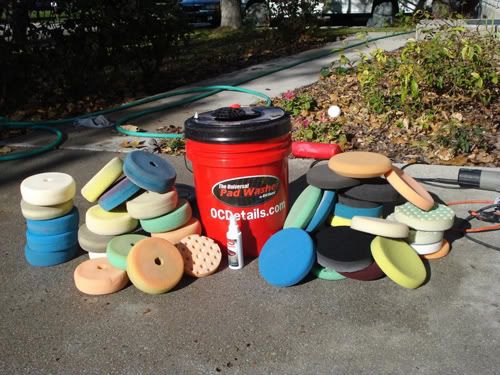
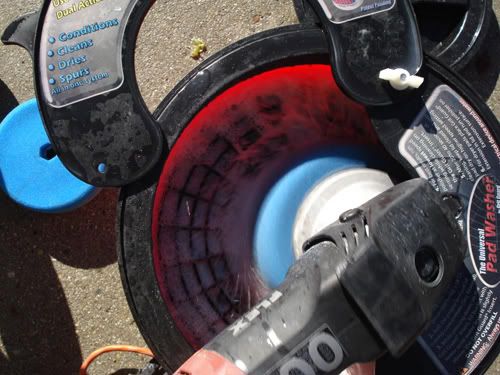
I did learn something interesting through this little experiment. I picked up my Porter Cable 7424 first to do the job, but I think the Flex 3401 is a little better at getting them clean. The entire motion of the Flex is gear driven and the pad doesn't stop spinning just because you put a little pressure on it. I cleaned a couple with the PC, but then I used the Flex for the rest.


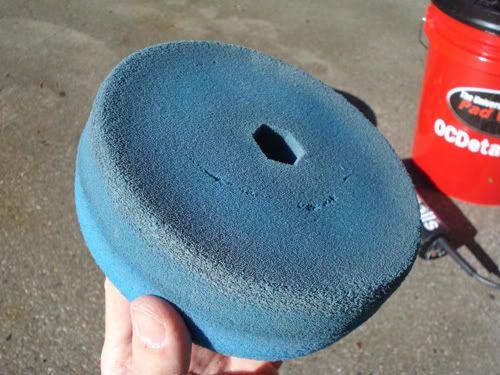
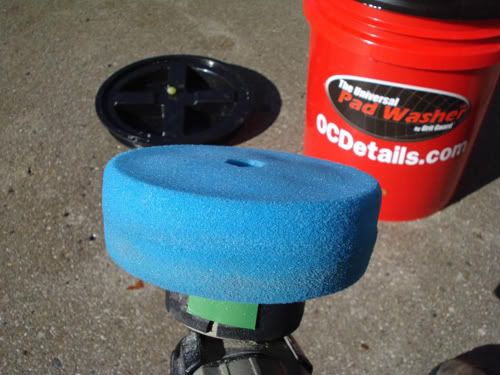
I started at 20 after the hour and I put the last pad back on the shelf at a quarter till. It took me maybe 30 minutes tops to wash and dry every one of these pads. And that is considering I had to switch from the Edge 2000 adapter backing plate on the Flex to the velcro one halfway through.


After I poured out the water there was quite a bit of... something left in the bottom of the bucket.


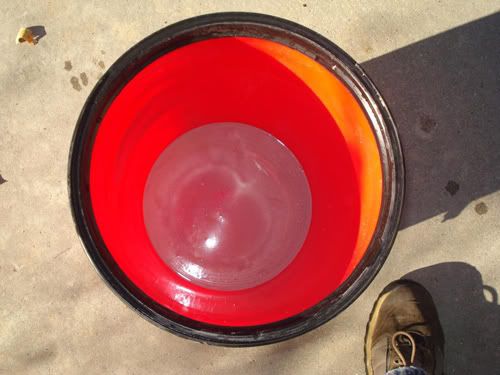
I would say that is just proof that it works! Every one of those pads had been sprayed out, so this is also proof that spraying a pad cleaner and hosing them off isn't enough to get them clean. If you value your pads and want them clean then this is a must have product! Even if you don't care that much about your pads, if you hate polishing with wet pads and the resulting mess that they cause, then you still need to get one of these. It is a new must have recomendation for OCDetails.com for sure!

9:33 PM

Souveran vs Fuzion

Posted by Anthony

I haven't done any good product comparison experiments for awhile, but I think I'm going to start again. I'm going to begin with Pinnacle Souveran Paste Wax and Wolfgang Fuzion Paste Wax. The test vehicle is a 2005 Corolla XRS in sort of a charcoal grey color.

First impressions:

Fuzion was a little tougher to apply and remove. They both were fairly easy, but the Fuzion bites a lot more trying to rub it off. The Souveran always comes off like butter.

Fuzion enhances the flake in my paint MUCH better than Souveran does. It almost made the side I used it on look bronze in the light. Once again, Wolfgang creates a product that provides an instant appearance difference.

Fuzion and Souveran both smell terrific while applying them.

This test begins today and will be evaluated every week for the next several weeks. I will be looking at dust attraction, durability, cleanliness (some waxes don't attract the dust and rinse cleaner in the rain than others), and appearance. The Driver side was waxed with Fuzion and the Passenger side was waxed with the Souveran.

I lined the car up with the sun so I would get equal light on both sides for the baseline pictures. The sun is pretty far south and it is tough to get direct overhead light this time of year. It is also a little hazy out there today, so the light was difused a bit.

Here are the initial Day 1 pictures for a baseline.


My Employee of the Month six months in a row approves of the shine. ;) he assisted in the application of both products. Again, if a five year old can do it, then so can anybody else!


Keep checking back for more updates on the progress!

9:29 PM

Pinnacle Souveran vs Wolfgang Fuzion

Posted by Anthony

I haven't done any good product comparison experiments for awhile, but I think I'm going to start again. I'm going to begin with [url=http://autogeek.net/pinsouvwax.html]Pinnacle Souveran Paste Wax[/url] and [url=http://autogeek.net/wolfgang-fuzion-carnauba-polymer-car-wax.html]Wolfgang Fuzion Paste Wax[/url]. The test vehicle is a 2005 Corolla XRS in sort of a charcoal grey color.

First impressions:

Fuzion was a little tougher to apply and remove. They both were fairly easy, but the Fuzion bites a lot more trying to rub it off. The Souveran always comes off like butter.

Fuzion enhances the flake in my paint MUCH better than Souveran does. It almost made the side I used it on look bronze in the light. Once again, Wolfgang creates a product that provides an instant appearance difference.

Fuzion and Souveran both smell terrific while applying them.

This test begins today and will be evaluated every week for the next several weeks. I will be looking at dust attraction, durability, cleanliness (some waxes don't attract the dust and rinse cleaner in the rain than others), and appearance. The Driver side was waxed with Fuzion and the Passenger side was waxed with the Souveran.

I lined the car up with the sun so I would get equal light on both sides for the baseline pictures. The sun is pretty far south and it is tough to get direct overhead light this time of year. It is also a little hazy out there today, so the light was difused a bit.

Here are the initial Day 1 pictures for a baseline.

[IMG]http://i2.photobucket.com/albums/y42/OCDetails/111508TESTING/DSC09447.jpg[/IMG]

[IMG]http://i2.photobucket.com/albums/y42/OCDetails/111508TESTING/DSC09453.jpg[/IMG]

[IMG]http://i2.photobucket.com/albums/y42/OCDetails/111508TESTING/DSC09455.jpg[/IMG]

[IMG]http://i2.photobucket.com/albums/y42/OCDetails/111508TESTING/DSC09462.jpg[/IMG]

[IMG]http://i2.photobucket.com/albums/y42/OCDetails/111508TESTING/DSC09463.jpg[/IMG]

[IMG]http://i2.photobucket.com/albums/y42/OCDetails/111508TESTING/DSC09464.jpg[/IMG]

My Employee of the Month six months in a row approves of the shine. ;) he assisted in the application of both products. Again, if a five year old can do it, then so can anybody else!

[IMG]http://i2.photobucket.com/albums/y42/OCDetails/111508TESTING/DSC09466.jpg[/IMG]

10:07 PM

SEMA 2008 with Autogeek.net

Posted by Anthony

SEMA 2008 was awesome this year!! I went down to work with the boys from Autogeek.net in their booth at the show. Dwayne has been a close friend for seven or eight years now and this was the first time we had actually met face to face. It was an awesome time! I'd go into more details, but there is that whole "What happens in Vegas..." code that I have to obey. ;)

Here is the booth the way we had it set up. Autogeek manufactures five product lines. Diamondite, Pinnacle, XMT, Wolfgang, and Detailer's Pride. We had pretty much the entire line for each product on display at the show.


Here is the mighty Max from Autogeek! It was great working with someone I have looked up to for having such a great company. Max, Dwayne and Jason were terrific to work with! I can't wait to do it again next year.


Here are Chris and Doug Lamb from Grit Guard. They spent the week with us in the booth demonstrating the Pad Washer and the Grit Guard. I gotta tell you, I hadn't seen the Pad Washer at work until this show, but after seeing it in action I am impressed! I will be writing a review on it soon and sharing the good word on an essential tool in detailing.


Sorry Chris. I know it isn't the best picture, but that's the one I got. ;)

You know what I didn't get? I didn't get a picture with Max, Dwayne, and Jason all together with me. Oh well... That is an opportunity that will present itself again the future hopefully.

I did manage to get pictures with other greats in the industry. Here is Barry Meguiar and Richard Griot to name a few.


Barry wrote some kind words with his autograph for me. He was familiar with OCDetails and what I've been trying to accomplish for the last several years. It was an incredible honor to learn that someone like Barry Meguiar knew about my work.

Here was another high point. Rick and Sam from Four Star Products stopped by for a visit. I designed the Four Star logo for them a few years ago and I have done a few things for Rick, but I haven't ever met him before. It was awesome to finally get to shake his hand and tell him how much I have enjoyed his products.


The show was just phenomenal and I had the time of my life. I will be working more closely with Autogeek in the future on some projects and I look forward to working with them in SEMA next year as well. I can't say enough about how much fun I had and how excited I am for what comes next. Thanks Autogeek! Here's to the future!

8:30 PM

Wolfgang Fuzion Estate Car Wax

Posted by Anthony


8:57 PM

Engine Detailing

Posted by Anthony

Engine detailing is not the mystery that people like to make it out to be. There are a few areas that you want to avoid, but other than that it is pretty easy. Here are some areas outlined on a 2005 Subaru Legacy GT engine.


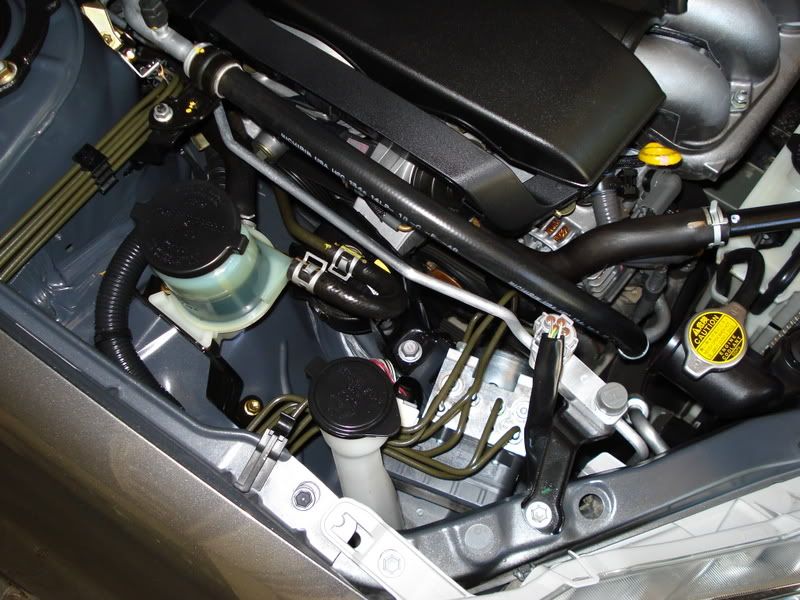
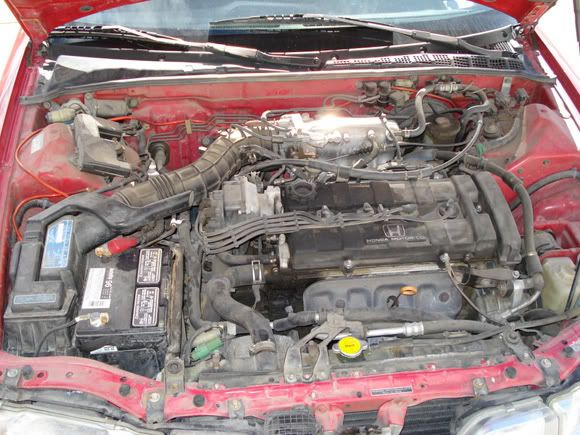
A: The air filter doesn't necessarily have to be avoided unless it is exposed. In the case of a short ram intake or a full length CAI you will want to keep the filter as dry as possible. This may include covering it with a pastiic bag, but just make sure you take the bag off again before you start the car.

B: This is the intercooler on the Legacy GT. Certian vehicles with top mounted intercoolers should have care taken around this area. The fins can be bent by high pressure and you don't want to be scrubbing them too hard with anything else that might bend them either. This is also an area for many other four cylinder vehicles that will allow water to get into the spark plugs. You'll find it difficult to start the engine if that happens, so try to avoid getting the top of the valve cover wet if there are four spark plug wires going into it. Examples of that can be seen in the photos section on the tabs at the top of this page.

C: That is what the alternator looks like. It is a cage looking thing with copper wires wrapped around inside it. You most certianly do not want to get anything flamable or combustible inside that. Especailly if it is hot. I've seen an alternator catch fire 30 minutes after the car was stopped because someone sprayed degreaser on it. Avoid spraying it with anything. You can shield it with a bag or even just a towel. Sometimes there are hoses and other things nearby that you want to spray, so just be careful and shield it whenever that is the case.

D: Avoid spraying the battery directly since that is an electrical connection. That other part above the battery is a fuese box in the Legacy GT engine bay. Most cars have something like that in there, so avoid those too. Would you spray water in the circuit breaker box in your house? I didn't think so. Don't spray them in your car either.

So that is pretty much what you want to avoid. Never approach engine detailing like you are putting a fire out anyway. Just remember that next to your paint (which your car can still drive without) your engine is the most expensive and definitely the most important part of your car. Don't risk screwing it up just because you want to take as little time as possible in cleaning it. Take your time on it once and then you can just blow through it every couple weeks or months after that. I'll be honest... I detail the engine of my Pilot every four or five months. Even then it isn't really much of a detail. I just spray some degreaser around the edge and rinse it off. Then I dry it and spray some CD2 Engine Detailer on it and walk away. A couple days later I might pop it to wipe it down again, but it is a five minute job every few weeks to keep that thing maintained.

Ok, so let's get down to the process of how you get it done.

First of all, and make no mistake about this, THE ENGINE MUST BE COOL! I won't be held responsible when you toss cold water on your motor after driving for two hours in the summer heat and having your block crack. I'm telling you know that the physics of hot and cold are not something you want to mess with. The best time for an engine detail is two or three hours after your car stopped running. I do my engine details in the morning before I go anywhere. For my customers if an engine detail is part of the job then I go to them and advise them to leave the car parked until I get there. If they must bring it to me then I tell them that I have to let the car sit for an hour with the hood up before I touch the engine and it might slow down my process a bit. I'm just not going to take any chances with damaging a hundred thousand dollar car's motor. Shoot, I'm not risking damaging my fifteen thousand dollar car's motor, so you can bet that I'm not going to take chances with yours either.


My degreaser of choice is Gunk Foaming Engine Degreaser. I like it because I can tell where I sprayed it and it sits on the grime a little longer than other types. I've used lots of other types and they all pretty much work the same, but given a choice I'll pick one that foams. It is probably just a personal thing, but this one doesn't smell as bad as some others and it just seems to be easiest for me to use. Anyway, I spray this product around the engine bay while avoiding the areas we have already talked about. I generally don't bother spraying the valve cover with it since that is going to either cause degreaser to drip somewhere I don't want it, or because that is an area I generally prefer to wash by hand. However you decide to do it, just remember to avoid getting it in the spark plugs or the alternator.


Don't let the degreaser sit too long. If it dries (which it will do in a hurry) then it can stain. You want to rinse it off as fast as you can put the can down and pick up the hose. Just use low pressure and your thumb to adjust the force of the stream. For the most part you just want to rinse the degreaser off, but there may be some spots where a little blast is appropriate. Rinse all the way around the engine and don't forget to flood the pools that collect near the fenders. Look down in the sides by the fenders and make sure there isn't any grimy water anywhere.

After you have rinsed off all of the degreaser you can go in with brushes and towels. For the most part I like to just use a couple microfiber towels and some diluted all purpose cleaner. The trick is to get your towel near the grime. For that you'll need some nifty tools. There are those cheap detailing brushes that I'm sure you have seen on the shelf at AutoZone and WalMart. Those work great. Decomissioned toothbrushes work great too. Last year I found an even better alternative to some of those tools though. They are called Slick Stixxx and they are one of the best detailing aides I've ever used. The handles are wrapped in silicone so that you don't have to worry about them scratching anything. There are multiple points and angled attachments to make getting even the hardest to reach area clean. Just wrap a worn microfiber towel around the point and jam that puppy wherever you need to get to. Then use a longer attachment to push it around the dirty areas and you'll be surprised how clean your engine will get. Don't be afraid to get your hands dirty on this. You only have to do it once and it will be easy to maintain from there on out.

Dry the engine well. This last step doesn't like to play well with standing water. Dry off everything you can and polish up the aluminum or chrome that you have showing. I use Eagle One Never Dull wadding on my chrome and aluminum to get the best shine possible. Some engines take more love than others, but nothing looks better than perfect chrome in the engine bay. The best part is that it is an easy product to find locally and it is even easier to use. Just pull off a piece and rub down the parts until they are shiny. Then wipe them down with a dry cloth and admire your work. Nothing easier than that.

Now would be a good time to make sure you didn't miss anything. Are all of the hoses clean? Did you get that junk out from around the oil cap? How about the reseviors? Are they all clean as well as the caps? Just take a minute and do a final inspection. This last step isn't something that is irreversible, but it is something that you really want to actually be the last thing you do before you close the lid. It sucks to pull the car out to show off your engine and then see a couple spots you missed behind all of the fabulous shine that you've got going on.

CD2 is a company that was bought by Turtle Wax a couple years ago. Until that point you could find one of their products called Engine Detailer on the shelves at several auto part stores. Then all of the sudden it just vanished. Nobody could find it anywhere. AutoZone used to be the only place I could find it and then suddenly even they didn't have it. I was forced to buy it off eBay or Amazon in order to get my hands on the good stuff. I was paying upwards of $12 per can for this stuff at one point, and then it suddenly came back. HAPPY DAY!!! The first thing I did was go out and buy fifteen cans of the stuff. I stocked my shelves well just in case it vanished again. The stuff is more addictive than crack and heroin combined. Just wait till you try it and then you'll understand.

CD2 Engine Detailer is to be sprayed on a cool dry engine. Techincally it is just for the rubber and plastic, but you can get it on chrome and paint as well. It won't really do much for those pieces, but you don't have to worry about harming them either. Of course, you still want to avoid the same spots that you watched out for during the degreasing and rinsing phases, but you should be a pro at that by now. ;) Spray the plastic and rubber with the Engine Detailer and make sure you get all the angles. You have to walk around the front of the car a couple times usually to get everything. I can usually get two or three cars out of a can of this stuff if I'm using it heavily. You should be able to get more distance if you have less plastic. TheLegacy GT has a lot of it, but my Corolla XRS doesn't have much at all. My Accord had even less, so you may be able to get a can to last you for many months. At about five bucks a can at AutoZone it isn't so pricey that you need to worry about it though.

The directions on the can say to close the hood and let the engine run for 20 minutes before you do the final wipe down. I've tried that lately and it does seem to produce good results. The heat sort of sets the product and all that is left is just excess. Wipe that off and you are good to go. When you first apply it you will notice that it is very wet looking. It dries to more of a matte shine after you heat it up and wipe it down. Don't worry about the shine for sure. Not only does it dull down a bit, it also doesn't become a dust magnet like other methods of shining the engine can cause. CD2 Engine Detailer is one of my favorite products around.

The bottom line is that engine detailing doesn't have to be ridiculously hard. You can do it yourself and get awesome results if you take your time. There is more risk in washing the engine bay than there is washing your car in general, but it is a risk that can be managed. Just take your time and be careful. As always, feel free to let me know if you have any questions. :)

4:02 PM

Using Craigslist

Posted by Anthony

I love to advertise on Craigslist for a couple good reasons. Number one is that the site is loved by the search engines. I get tons of traffic to OCDetails.com from my Craigslist postings. The other reason is that it absolutely works for me in my area. I have several customers who I can trace dozens of cars through just because they found me on Craigslist and offered me their friends as referals. It is a beautiful way to run a business.

There are a couple ways to utilize Craigslist to run your business. You can just put down your text and upload a couple pictures that show on the bottom of the ad. A better way is to use a little html coding and put the pictures in the body of the ad. Or even better, you can also write the ad in a program such as Dreamweaver and make it really stand out. Here is an example of the post that I use.

Click the graphic to see the whole page.

Craigslist has changed a little bit recently and the hotspots on the pages that I am using as well as the images don't redirect to the links I have them set to send you to. That doesn't matter though, because I have the links at the bottom for navigating through the pages.

The way I make this work is I'll post the Oxidation page first. The links all send you to the site that you are looking at it on right now. Then the next day I'll post the Swirls page and change the links to the Oxidation page as well as the Swirls page. Each day I post a new page and update the links. Evenutally all of the ads are up and they all cross link. When a visitor finds one of the pages they will be able to view them all within Craigslist just like it was my own personal website.

You don't have to get as fancy as I have to make this work. A more simple design will do the trick. Here is one I built for a friend who used to own DetailCity.com. I have forwarded it to the current owner. Perhaps it will be something he uses. The principle of what you would accomplish with this type of design is the same as the one I'm using.


The whole point is that you can utilize online classified sites such as Craigslist to really advance your business. If they are going to be kind enough to allow you to use full html coding in your ad, then why not take advantage of that?

The page that I made is free for anyone who wants to use it. Just right click and copy the source code into whatever html editor you want to use. To edit the graphics you can just 'right click' and 'save as' into a folder on your computer. Feel free to let me know if you need any help. Help is free, but if you want something custom designed, then we can talk about that too. Enjoy!

EDIT: I found an interesting page that shows how to put a counter on Craigslist postings. Obviously you can add any old counter, but I thought this was interesting. Click Here to read all about it.

4:15 PM

1993 Integra and Oxidation

Posted by Anthony

Oxidation is a very serious problem for some vehicles. Unprotected paint that is exposed to UV rays and outdoor environments will fade and oxidize very very quickly. In fact, red is the first color in the color spectrum to oxidize. Red vehicles will start to go pink within 18 months if they are not waxed and protected properly.

Oxidation is similar to plaque on your teeth. It builds up over time and eventually just washing won't resolve it. When you have enough plaque built up on your teeth you have to go to the dentist for a cleaning. The process of removing the plaque is almost identical to removing oxidation off of the paint. You take your polisher and load a cutting pad with some sort of paint cleaner or polish. I don't know what they use on your teeth, but I have felt how grity it can be, so I'm sure that they may be using some sort of abrasive polish. These small abrasives will effectively "sand" the paint and remove the layer of oxidation just like the dentist will remove the plaque. Under that faded surface could very well be a bright and shiny finish. You just have to find it.

Wax and sealants act like sunscreen for your vehicle. If you keep your car properly protected from the environment and UV rays, then fading and oxidation like what this 1993 Acura Integra has to deal with is much less likely.

I used Four Star 4-40 One Step and topped it with Four Star Ultimate Paint Protection. The work was done with the Edge 2000 orange pad on a Porter Cable 7424 Random Orbital polisher. The product 4-40 can be difficult to find these days, but it is basically just a chemical paint cleaner that does most of the work through the solvents that it contains. Products like Klasse AIO are similar in that they don't have any physical abrasives. You could use any polish to achieve these results really. I just like using chemical abrasives whenever possible if the paint is in this bad of condition.


The engine of this particular car wasn't very clean either. I can't ever pass up the chance to detail an engine, so I jumped on this one. The process of detailing an engine can be found in more detail on OCDetails.com and in other posts on this blog.


Overall I am very pleased with how this car turned out. If nothing else I hope it serves as an example to show you that your car may not need a repaint after all. It may just need a detailer and a little TLC. I will be posting other oxidation removal projects on this blog as well, so definitely don't give up hope on your car. It isn't as bad as you might think. Oxidation removal has become somewhat of a specialty of mine and people are always amazed at how much better the paint looks. I don't take much credit for that, really. It was the polisher and the product that did the work. All I did was watch. :)

4:25 PM

Audi A6

Posted by Anthony

Today was a fabulous day for detailing. If it hit 80 degrees then I'd be surprised. It was amazing outside. It was the kind of day that would have been perfect to go golfing, but I had a car to detail.

This is the car of my former director at my previous job. I have been out there a couple of times either detailing her vehicles or their son's vehicle. This time it was a new car that I haven't done before. The Audi A6 that she is presently driving is a lease takeover from her sister. She said it is the first car she has ever driven that was actually 'fun' to drive in addition to being transportation. She doesn't typically purchase vehicles for the fun factor, so it has been a fun car for her.

On arrival I pulled the car into the sun to see what I was dealing with. Swirls, industrial fallout (IFO) such as overspray and tree sap, and just general dirtiness. The inside was actually pretty clean, so I knew most of the work would be the outside.

That kind of swirl damage isn't tough to resolve, but Audi paint can be pretty hard and unforgiving when it comes to this kind of thing. Good thing I brought a selection of polishes with me, eh? :)
First order of business was the washing of the car and cleaning the engine bay. I always start with the wheels and tires first, but these had been freshly detailed so I considered skipping those at first, but then decided that it was best to be thorough. The tires were glossy black and looked
freshly dressed, but who knows who did that and how long it has been since the tires were cleaned. So out came the Eagle 1 A2Z wheel/tire cleaner. The engine wasn't too dirty and basically just needed a rinse and a little attention with a towel.

Washing the car wasn't too difficult either. It was the claying of the car that got tricky. It wasn't overspray, but there was something localized to the hood and front fenders that made the surface feel like sandpaper. I think what it happened is the car was parked under a particular tree that likes to spray sap all over the place in a fine mist whenever the wind blows. This covered the front of the car and was very difficult to remove. I'm sure I put a couple new lines in the paint while trying to get it off, but polishing takes care of any damage that clay creates, so I wasn't too worried about it. It was a brand new piece off a Clay Magic bar and it was doing a good job.
Polishing was the next step. I used Danase Swirl Abolisher II to start with, but I saw that it wasn't doing the job. I only brought a white and a blue Edge 2000 pad with me, so if I was going to get results then I would have to step up to the Swirl Abolisher III. I don't use that one very often, so I was anxious to see what the results would be. I've only detailed a dozen or so vehicles with my FLEX XC3401 polisher this year and even fewer with the new Edge 2000 adapter modified backing plate, so this would be a good test.
It took two hours of polishing total to restore the paint to picture perfet condition. I topped it off with Danase Paint Sealant for great protection through the coming months of fall and the start of winter. More photos can be seen in the Photo section of the Blog. Here are a couple of them.


All said and done it took 4 1/2 hours to get the car looking new again. It is smooth as a baby's bottom and well protected. While working on it I passed out half a dozen business cards to neighbors who drove by and wanted their vehicles done as well. Because it turned out to be a great day for referals as well, I cut the owner a little bit of a discount on the job.