


Typically I'm closed for the season from November through about March, so I don't really get too many calls this time of year. One of my regulars referred his buddy who was trying to sell a motorcycle on Saturday. He was showing it to someone on Sunday, so I figured if I push this back too far then he may very well sell it before I get a chance to make it look as good as possible for the new owner, so I dropped what I was doing and made the appointment. I figured, it's just a motorcycle. How tough could it be? (famous last words)
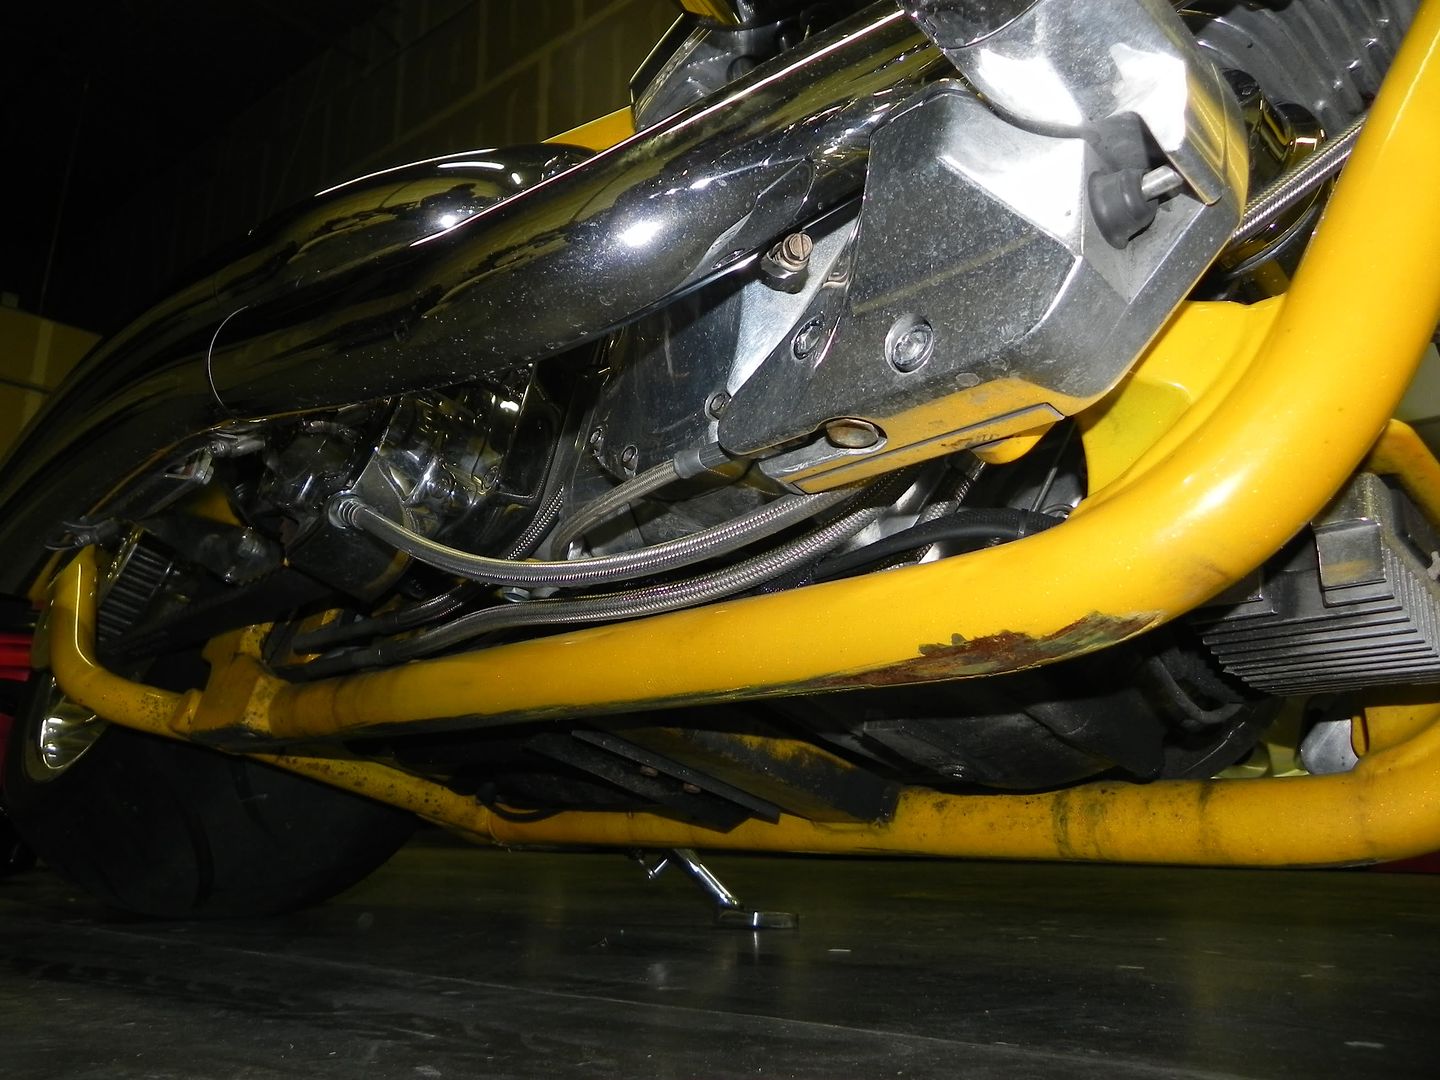
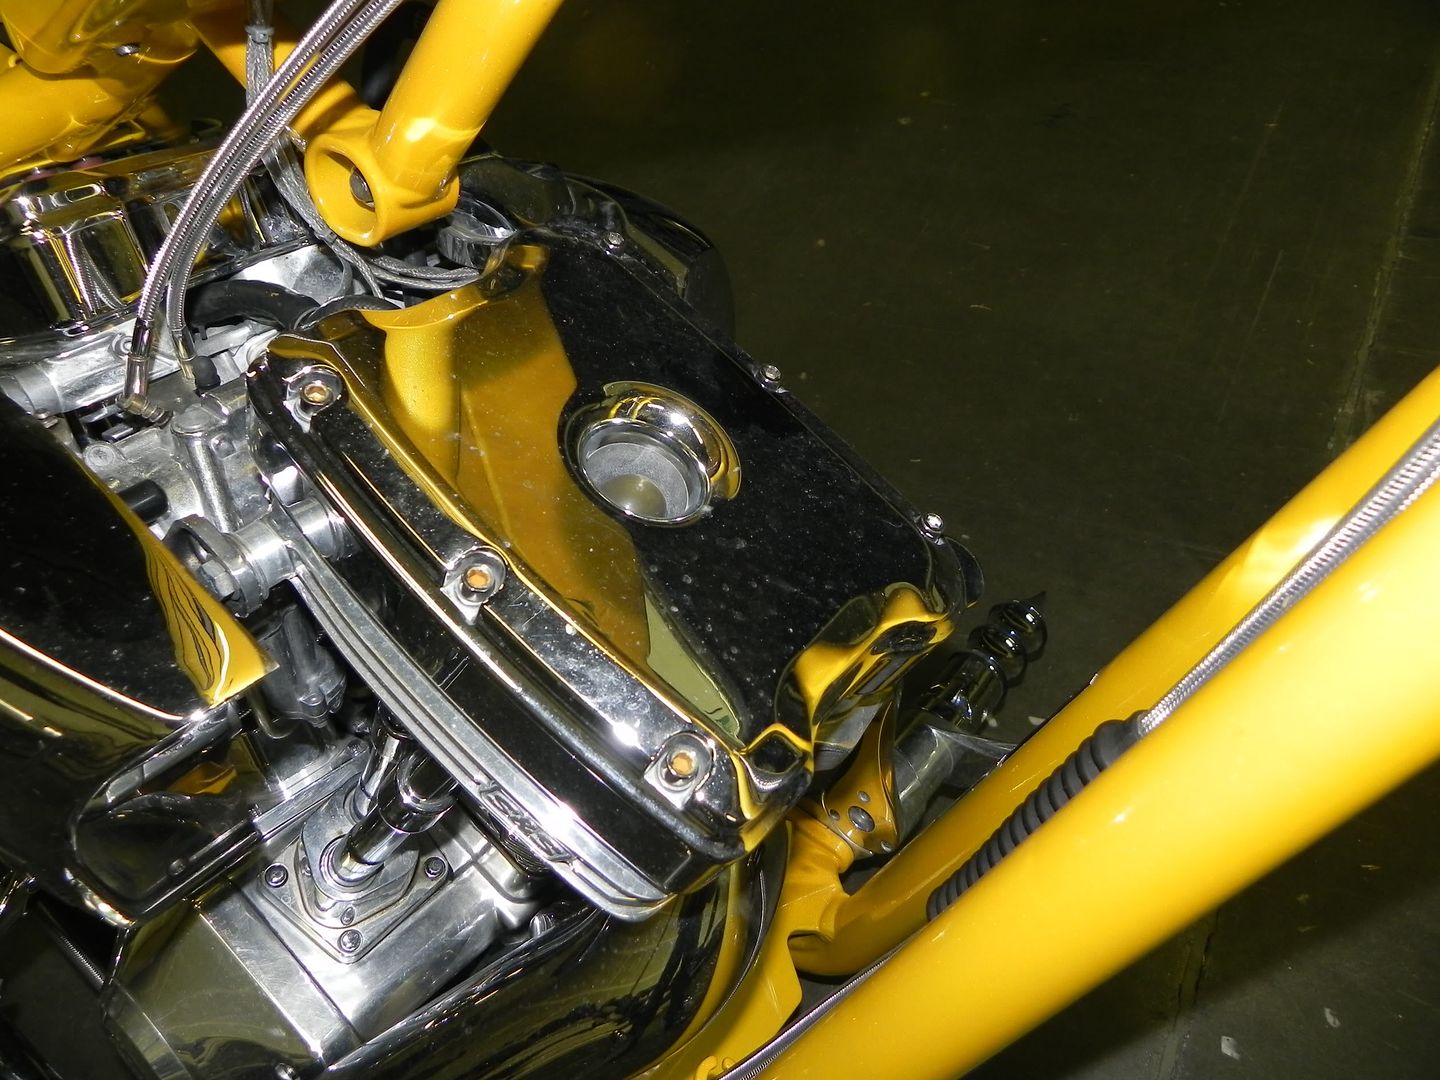
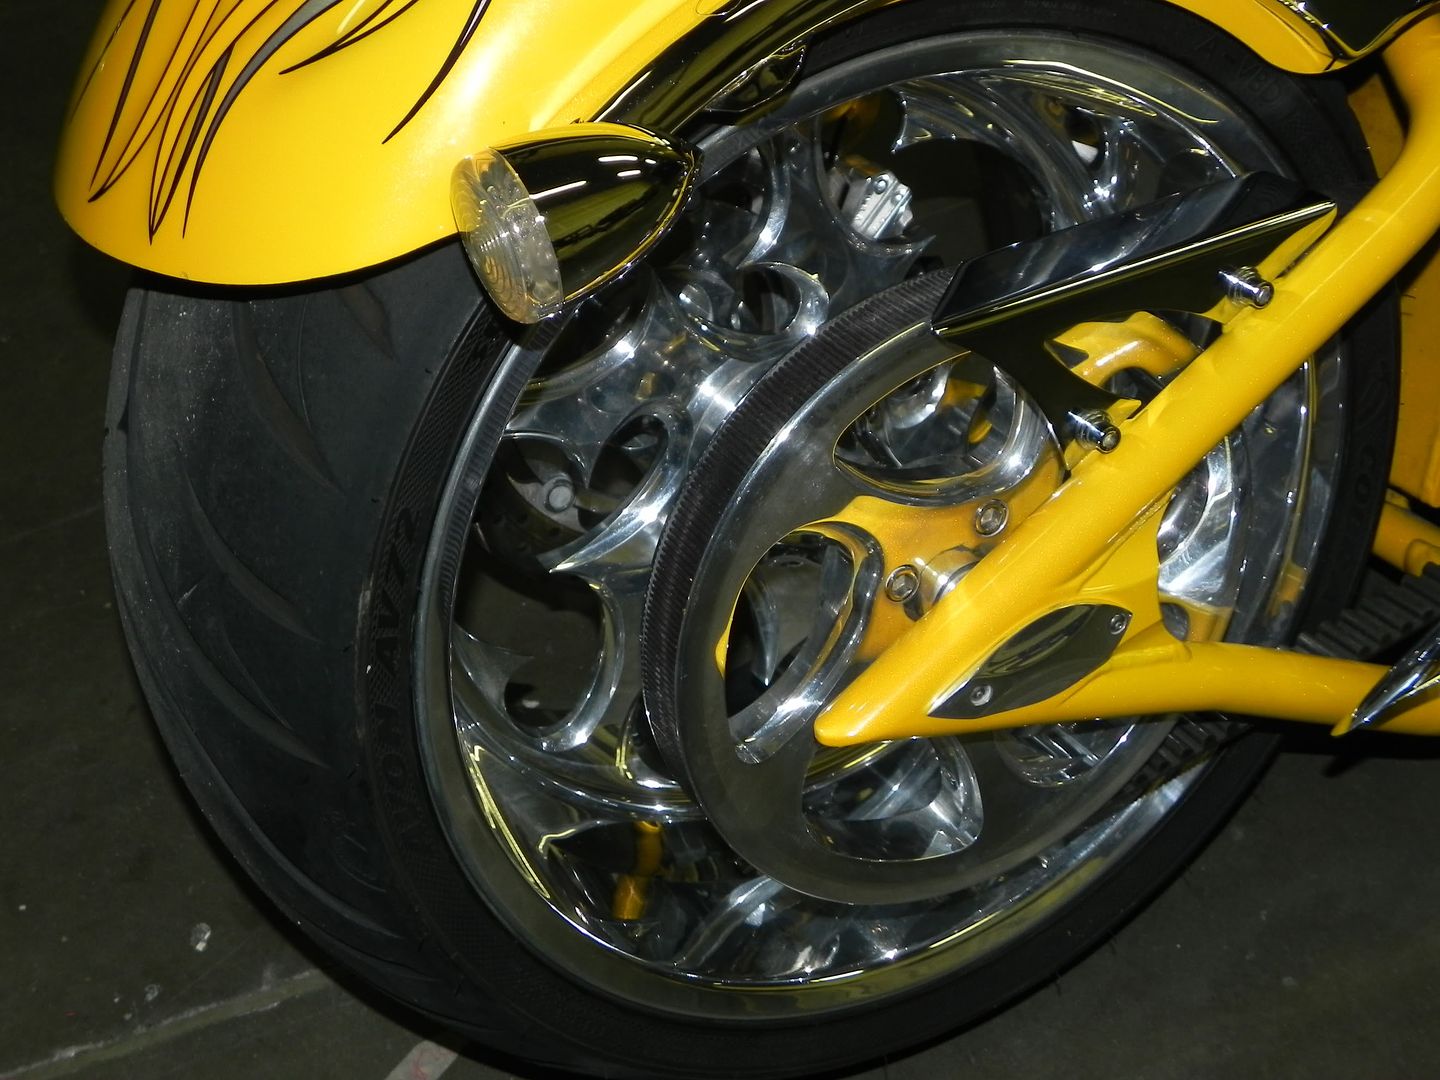
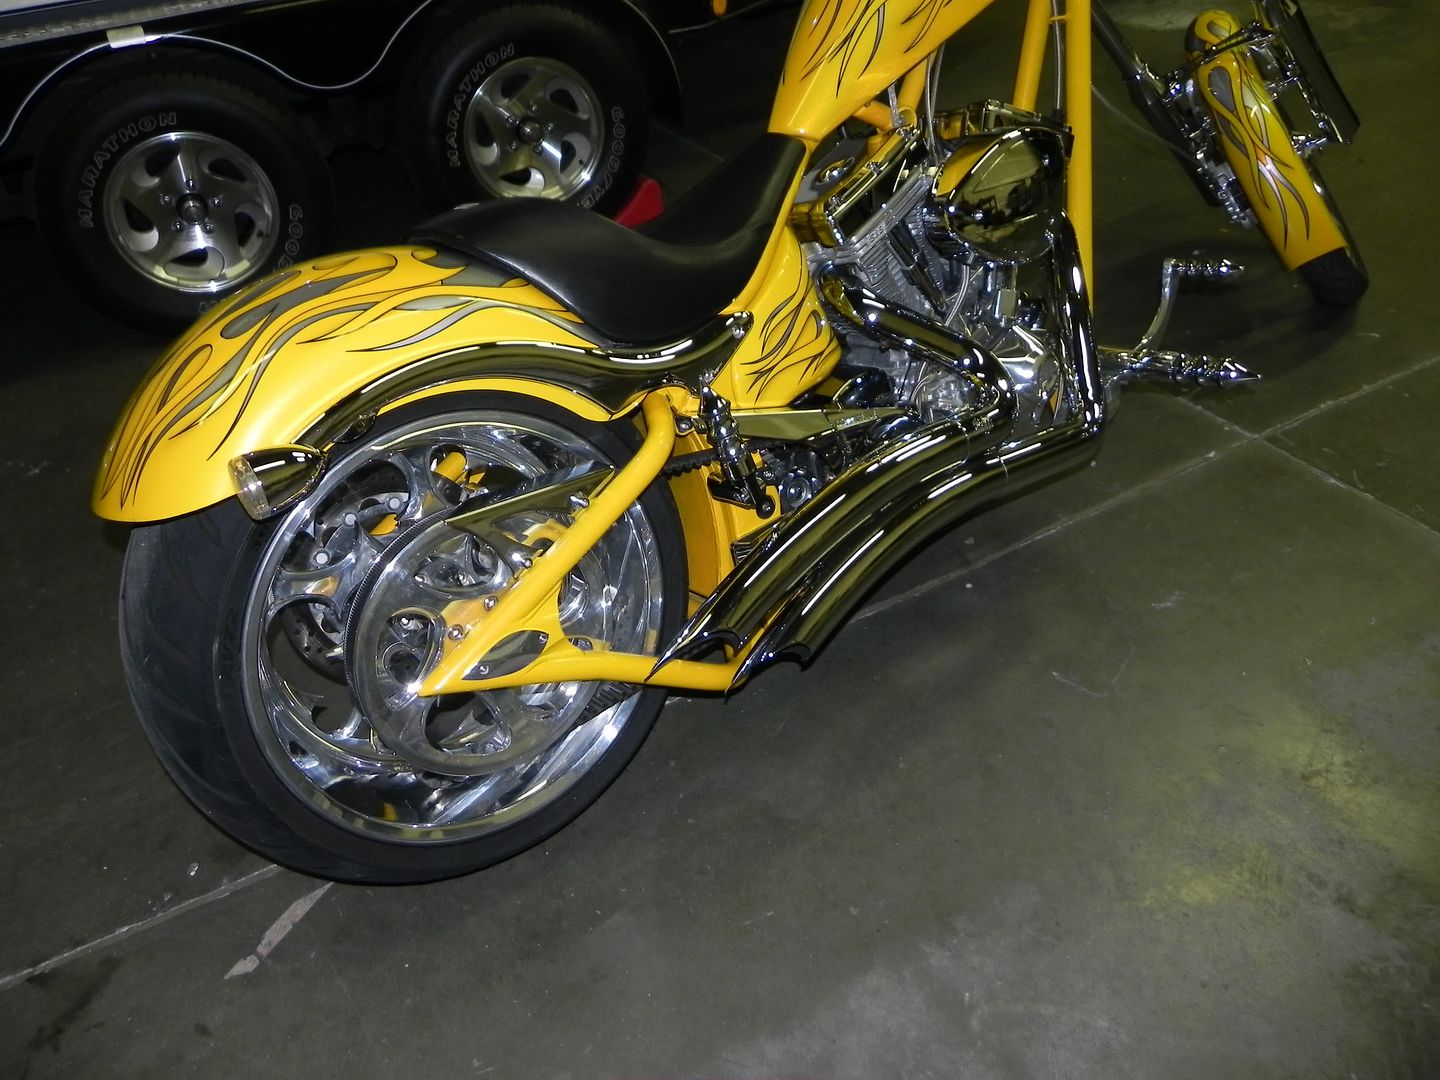
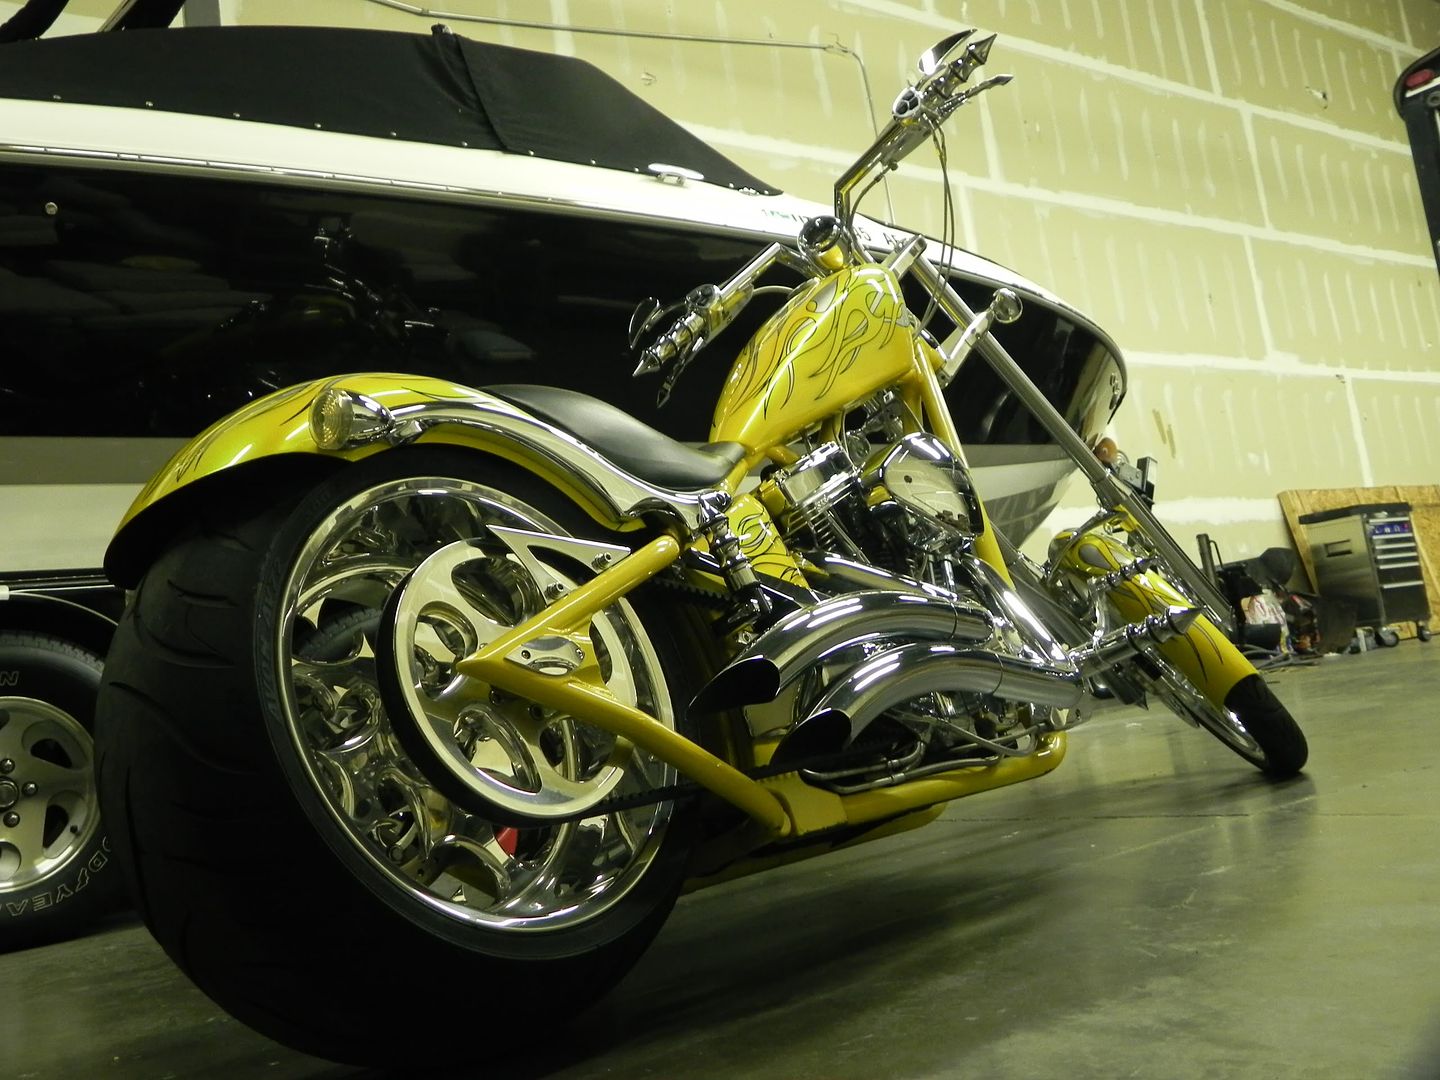
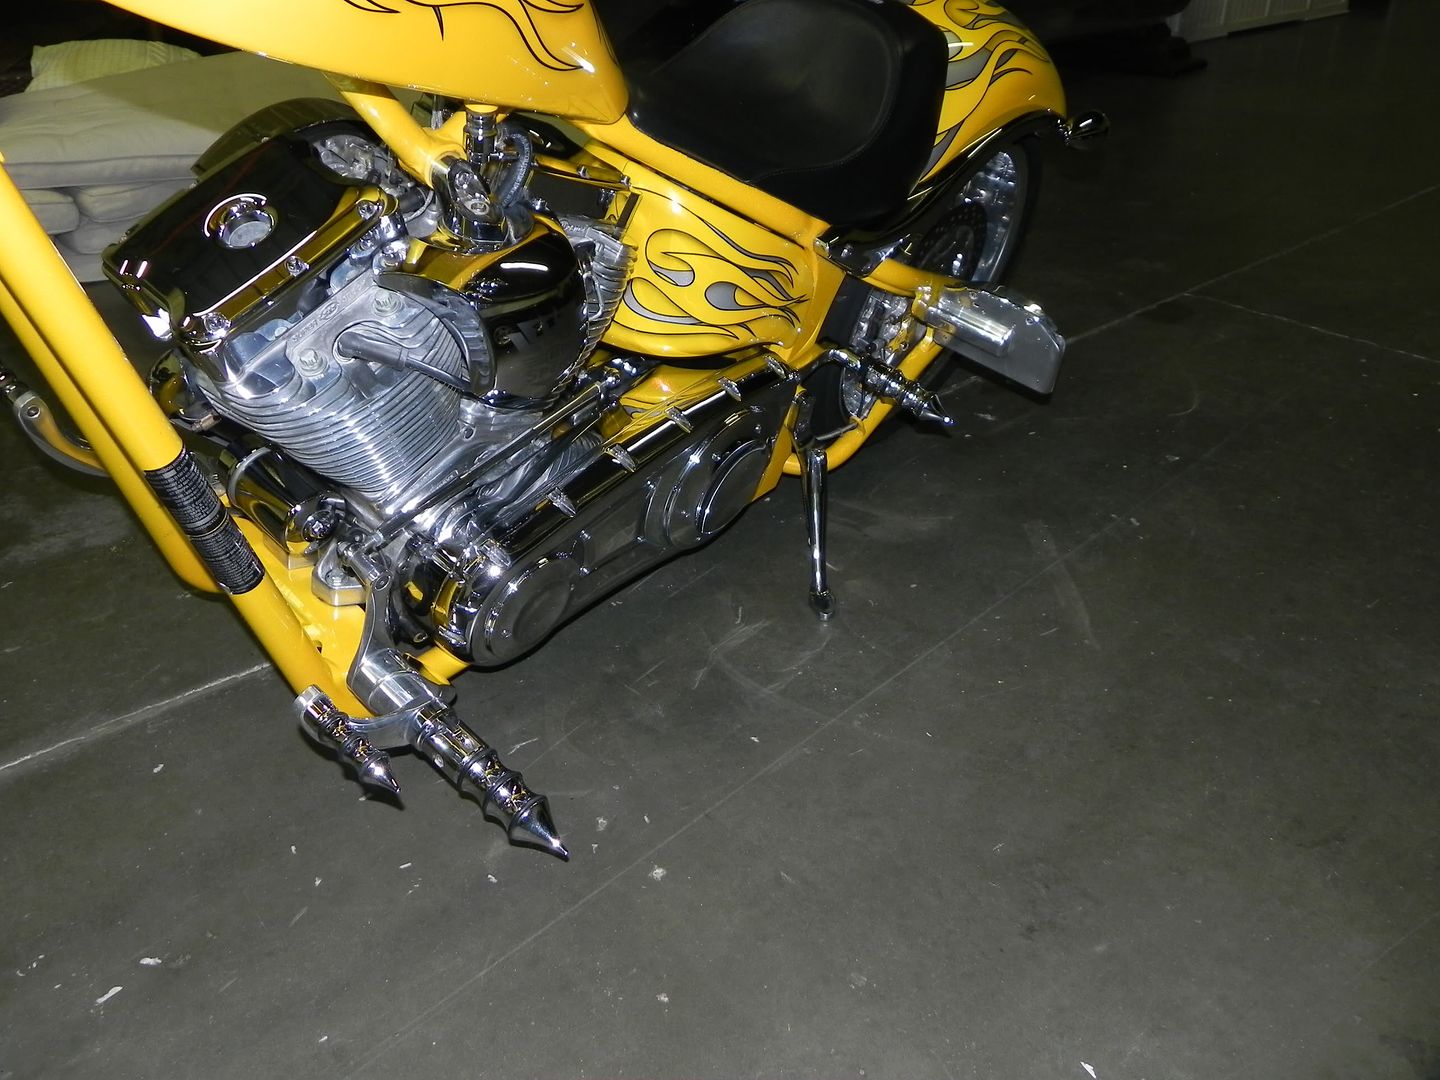
Well, apparently he had left it in the sprinklers overnight and then put it away wet. Grrrrrr... Gotta love that... This is EXACTLY the reason my bike has very very little chrome on it. I could sit down and polish all the chrome on my bike with a tooth brush and be done in 30 minutes. This bike was another story though... Very little WASN'T chrome. Still, it is an awesome motorcycle and spots happen to all of us at some point or another, so it was time to get to work!
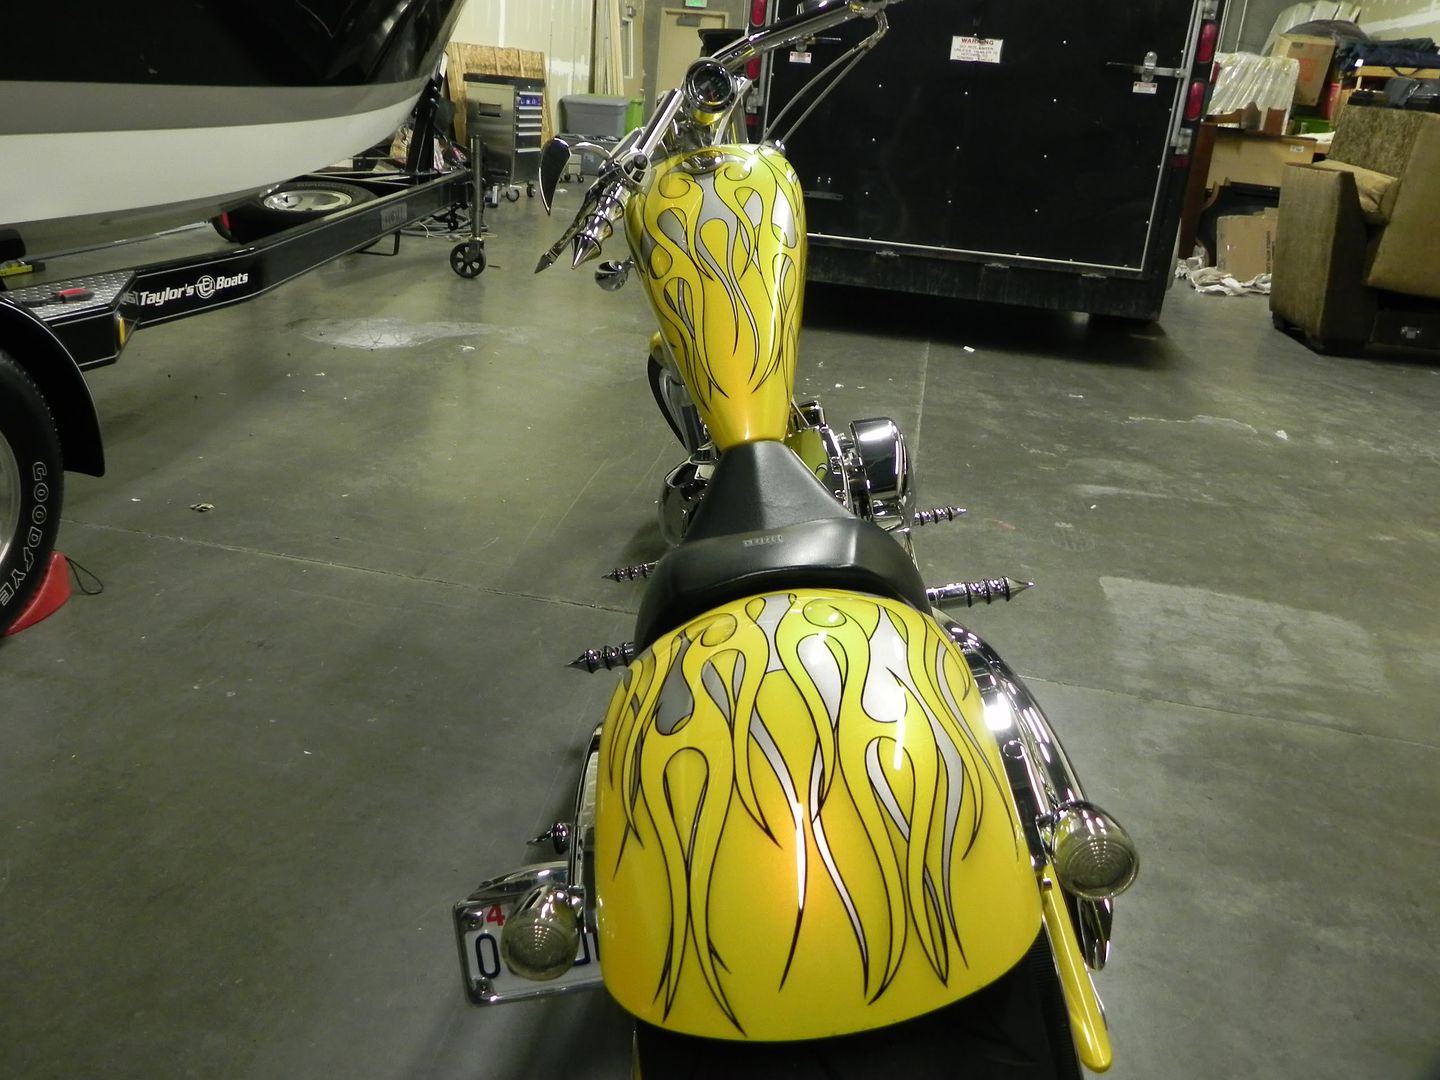
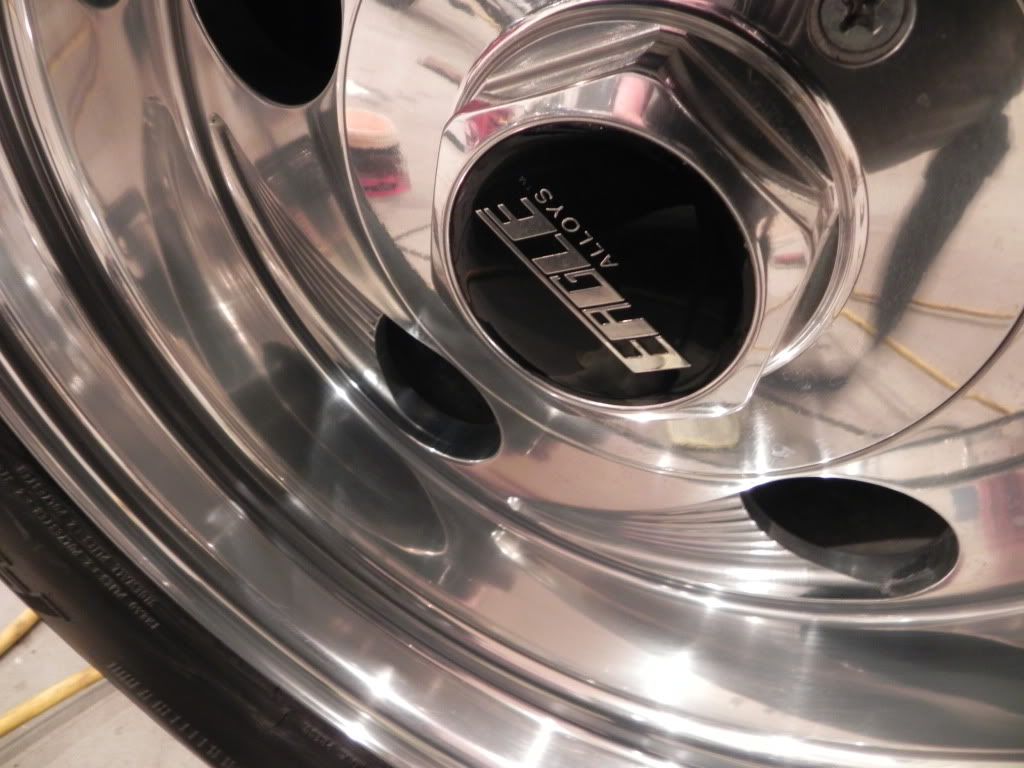
So here are some before shots. Not totally thrashed, but the chrome was pretty dull in some areas and all of it was spotted. The freaking wheels were ginormous! 300 series tire on the back with probably a 4 inch deep dish on both sides. They were huge! Huge and water stained.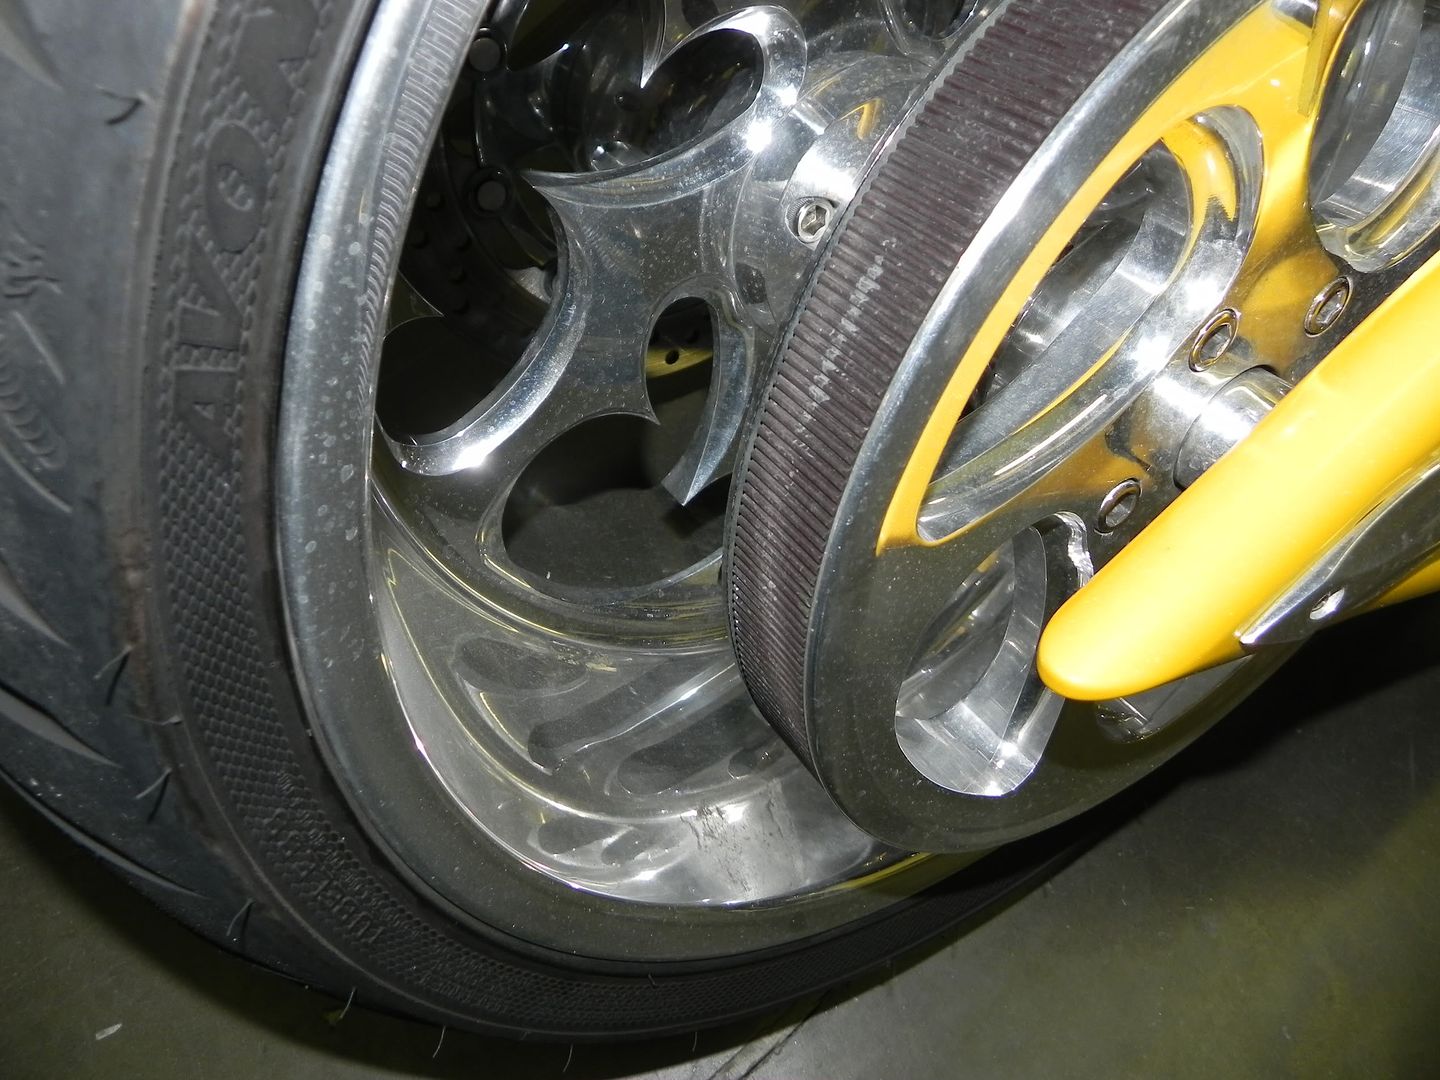
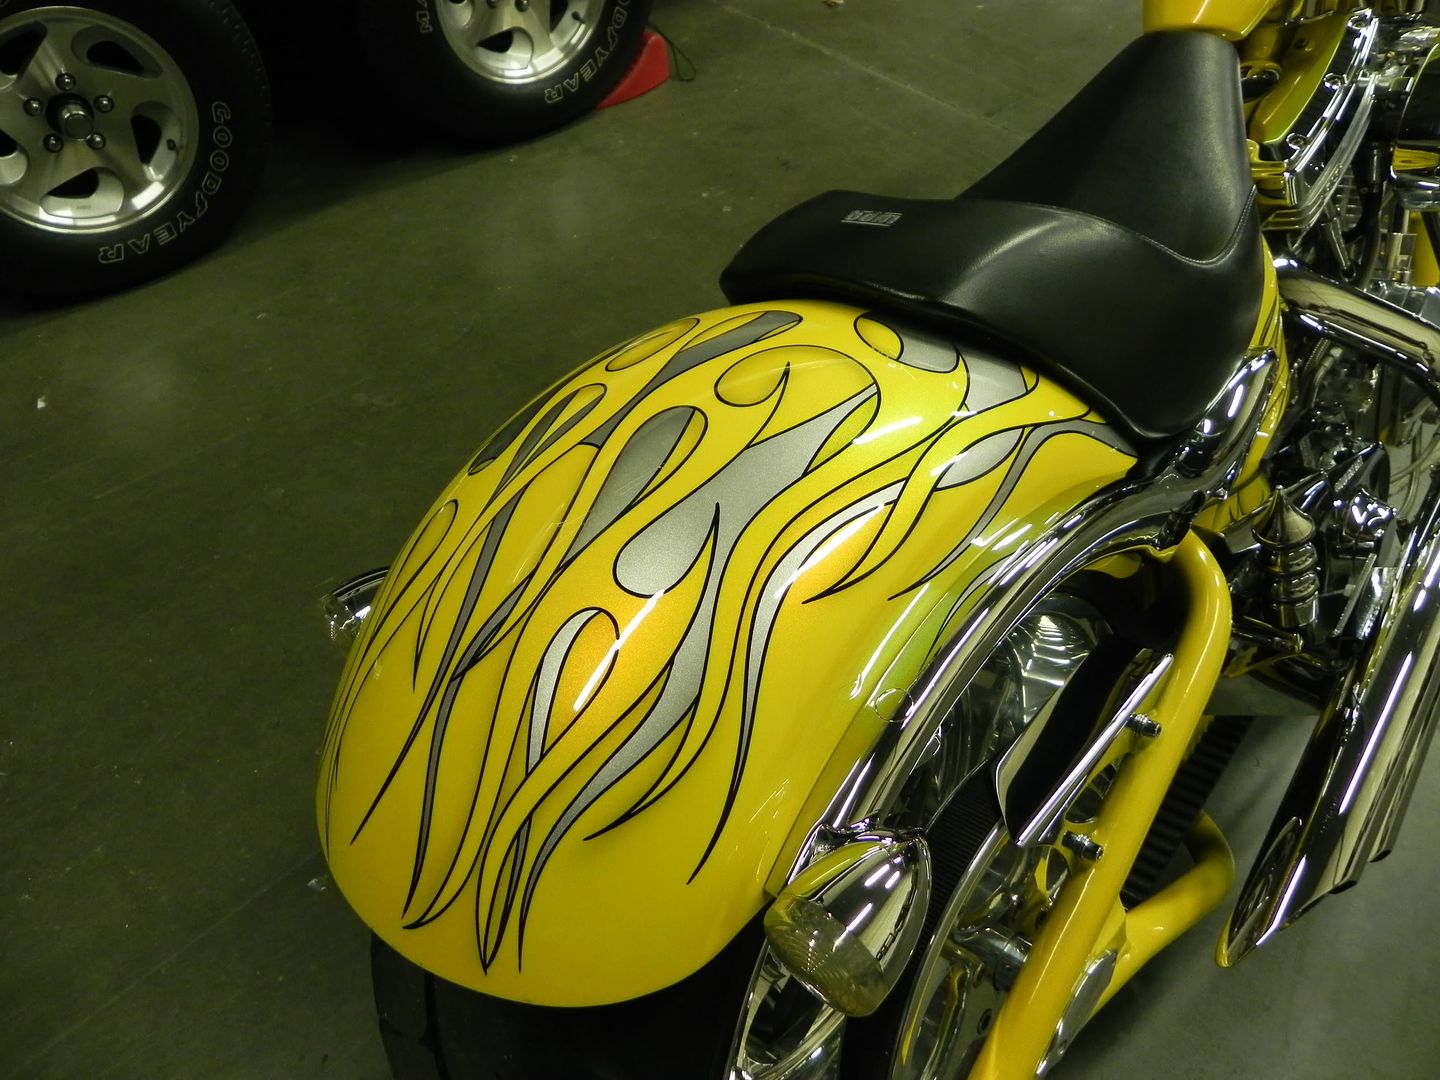
The paint was in pretty good shape. The only real problem was where the seat connected to the fat rear fender.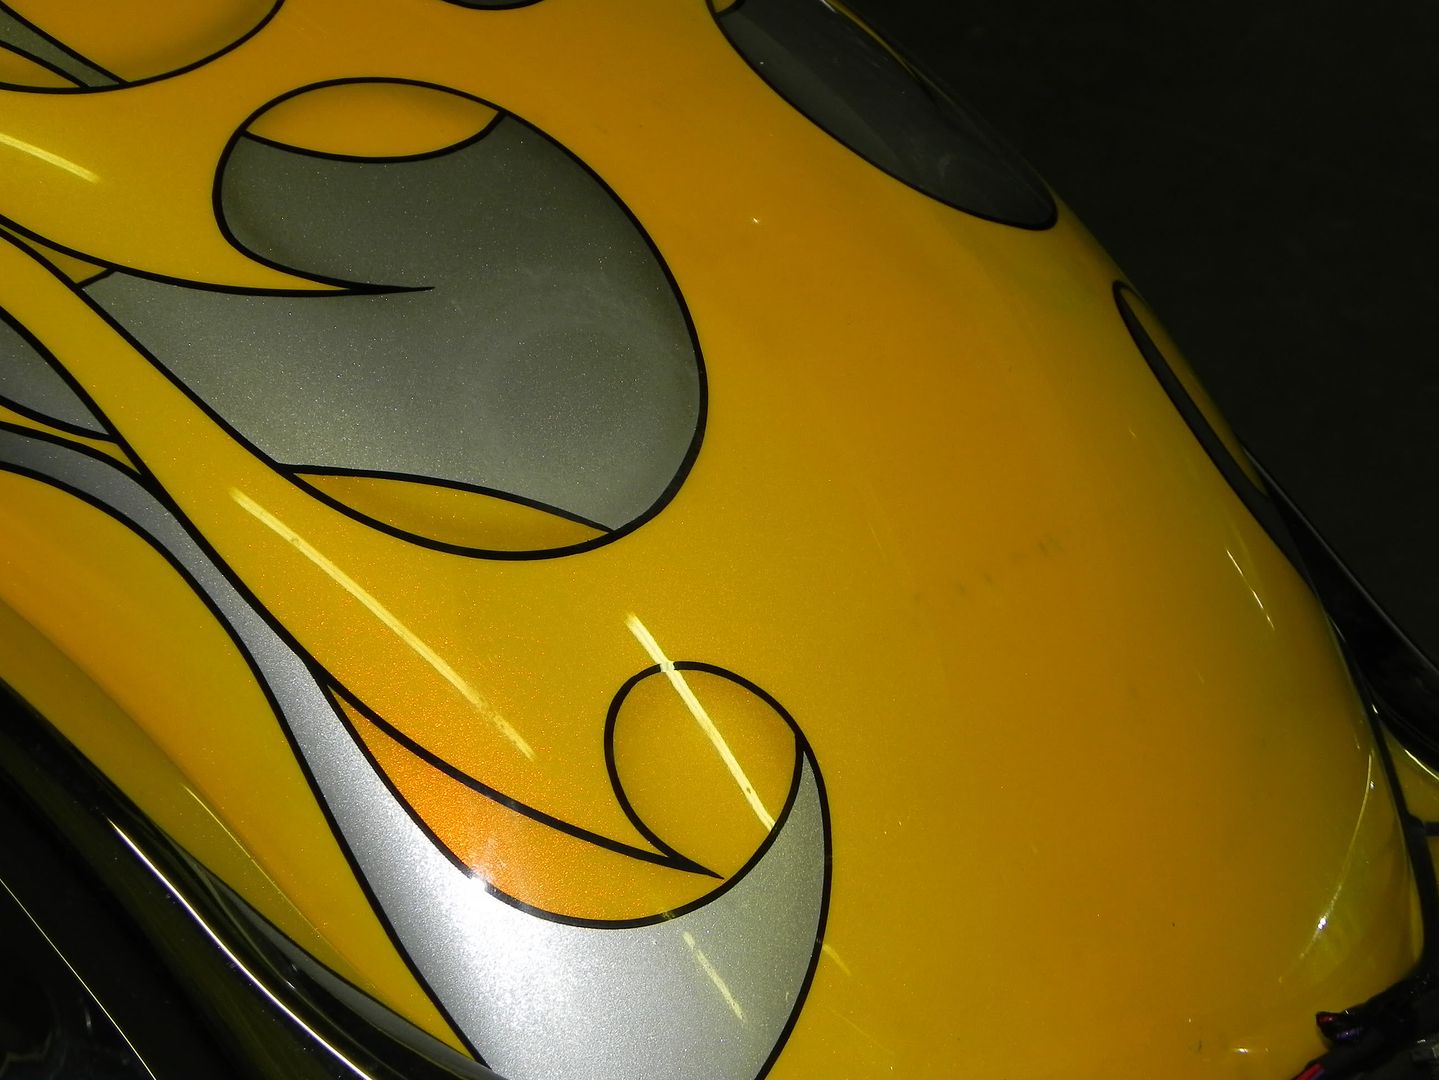
It has a great pearl clear coat on it that I'm sure looks amazing in the sun. I'm just not a fan of yellow choppers or that style of graphic on them.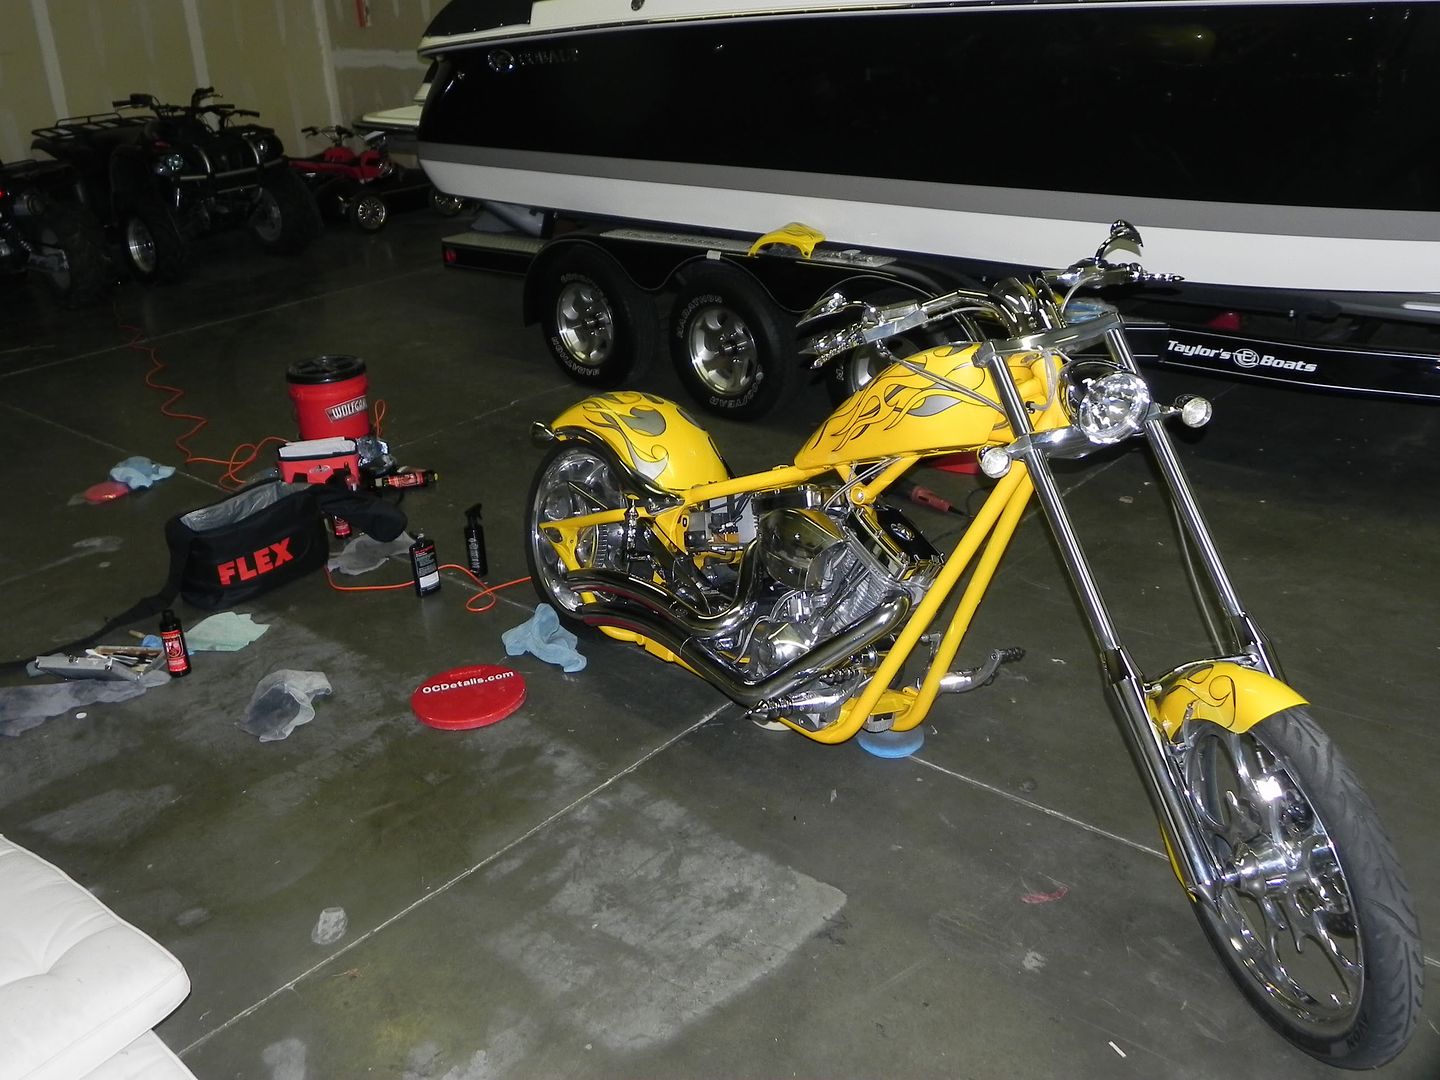
Not really too many action shots here since I was by myself in this warehouse polishing chrome, but I can say that it came out pretty good. I brought a whole bag of metal polish not knowing in advance how serious the spots were going to be. Ultimately I used Wolfgang Concours Aluminum Polish for most of it. The spots were coming off pretty easily with that and it really brightened up the chrome. The paint got Pinnacle Advanced Finishing Polish since it was in pretty good shape. Then I decided to see what a little Wolfgang Paint Sealant would look like if I topped it with Blackfire Midnight Sun paste wax. I didn't get to see it in the sun, so I'm just going off my belief that both of those products are outstanding by themselves, so layered they can only look even better. On a yellow with a pearl coat like this has, I'm sure it looked outstanding.
I finished off the chrome with Blackfire Metal Sealant just to help keep the spots from staining like that again and then cleaned and conditioned the seat with Pinnacle leather cleaner & conditioner. I was in and out in 3 hours flat, so that makes me happy. For once I actually estimated the time right. lol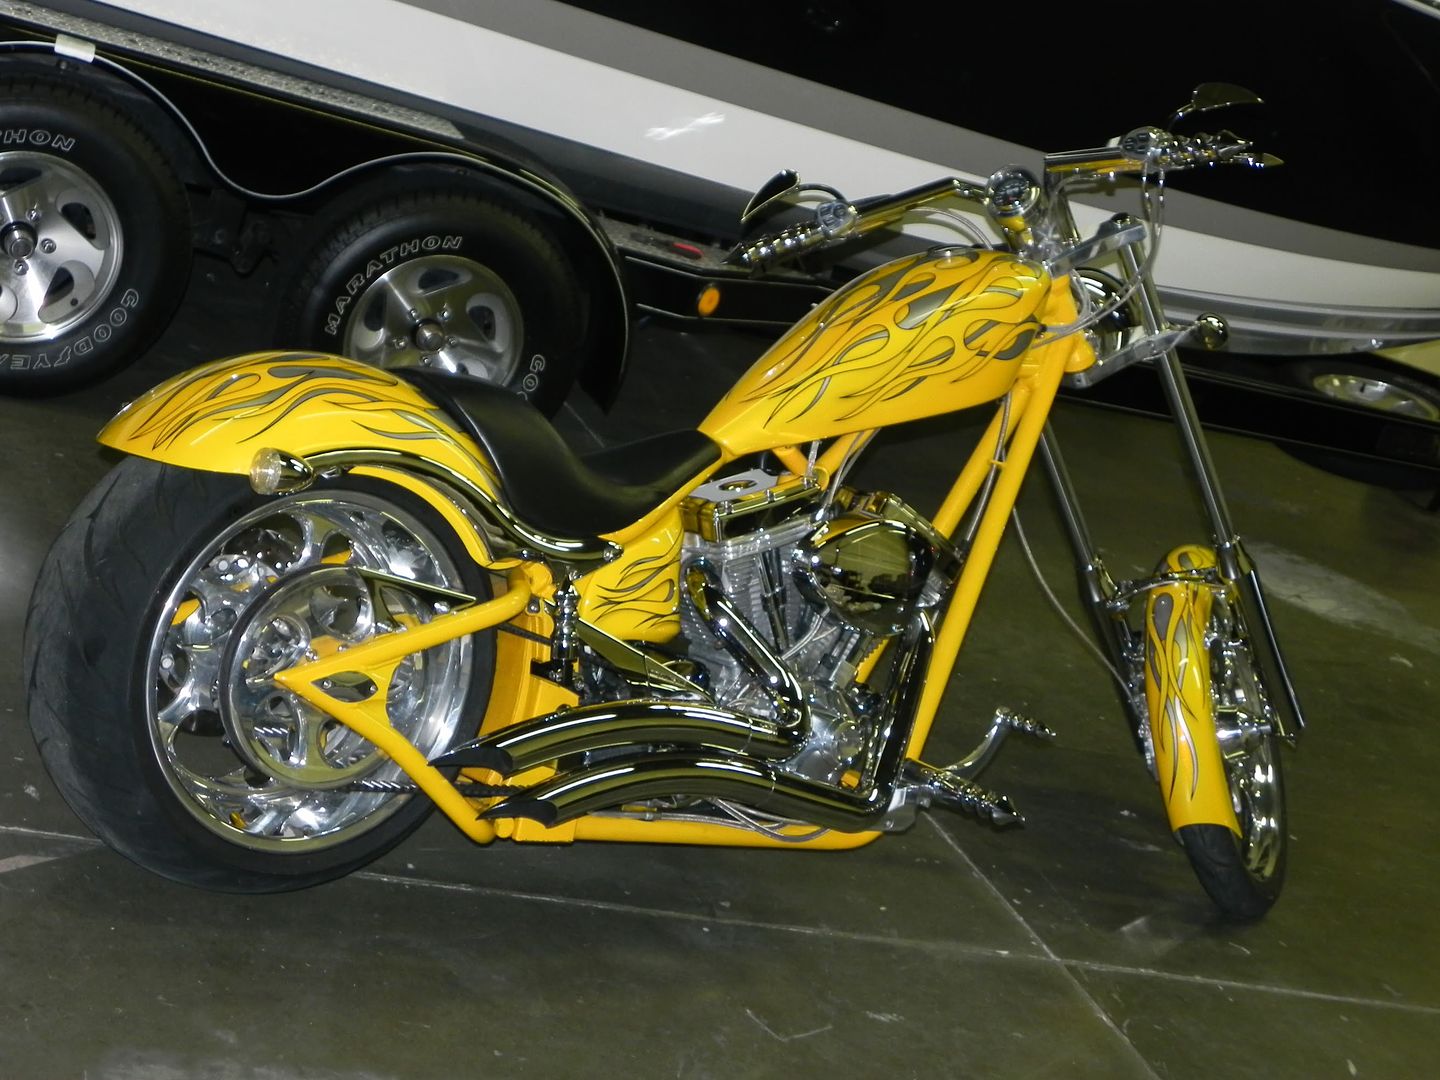
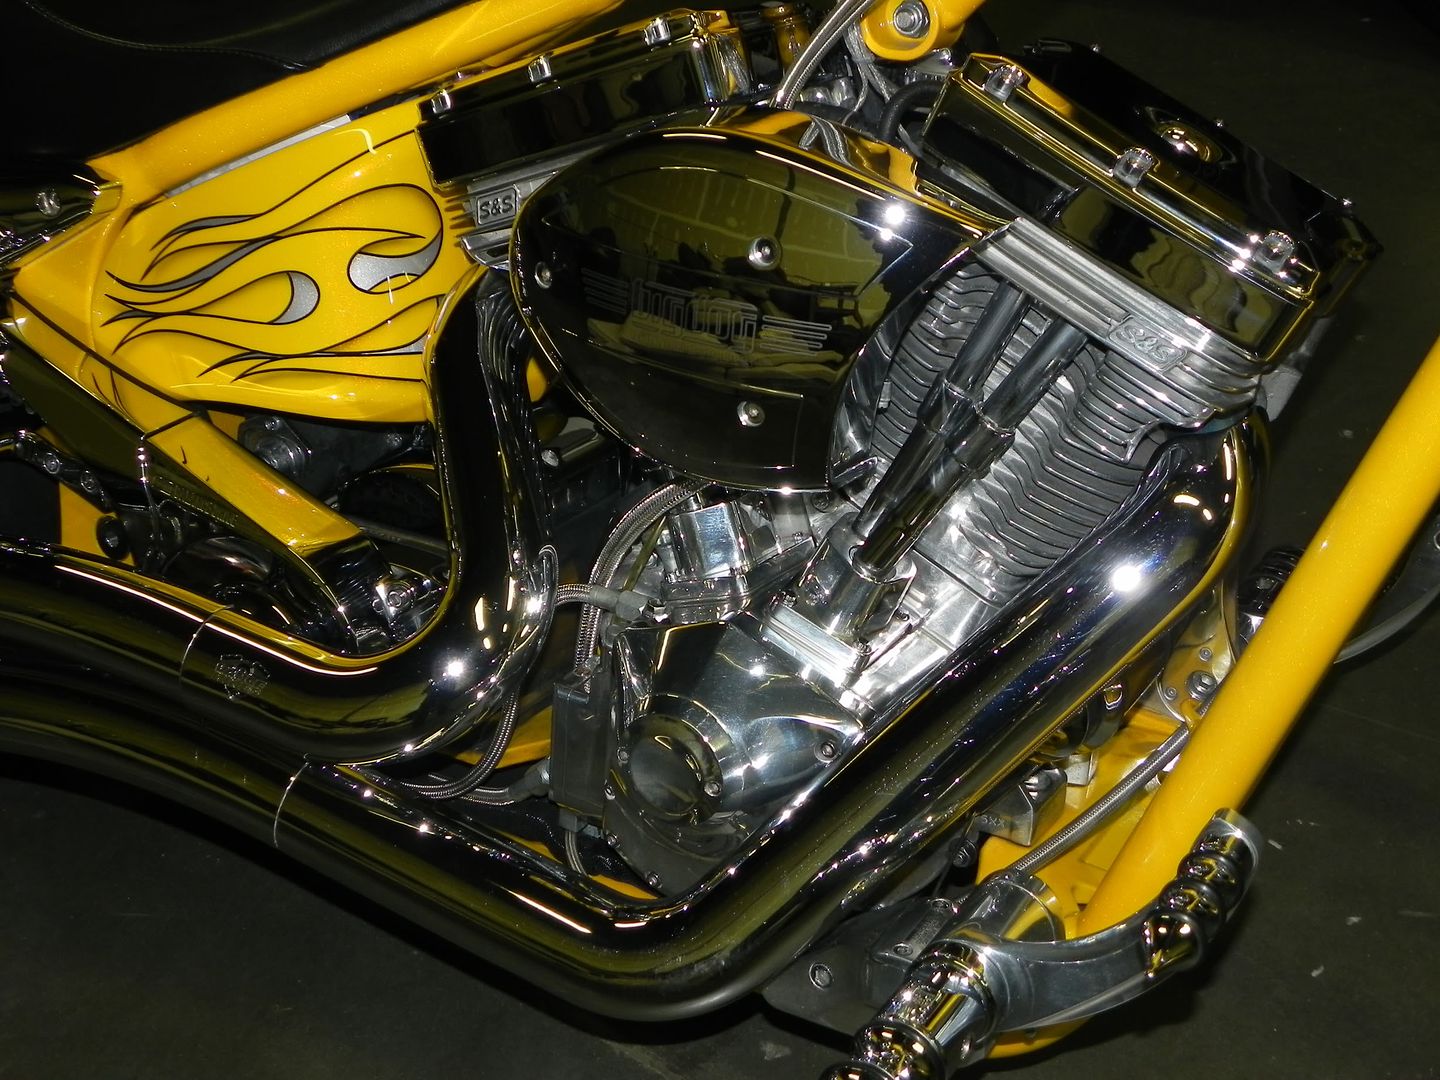
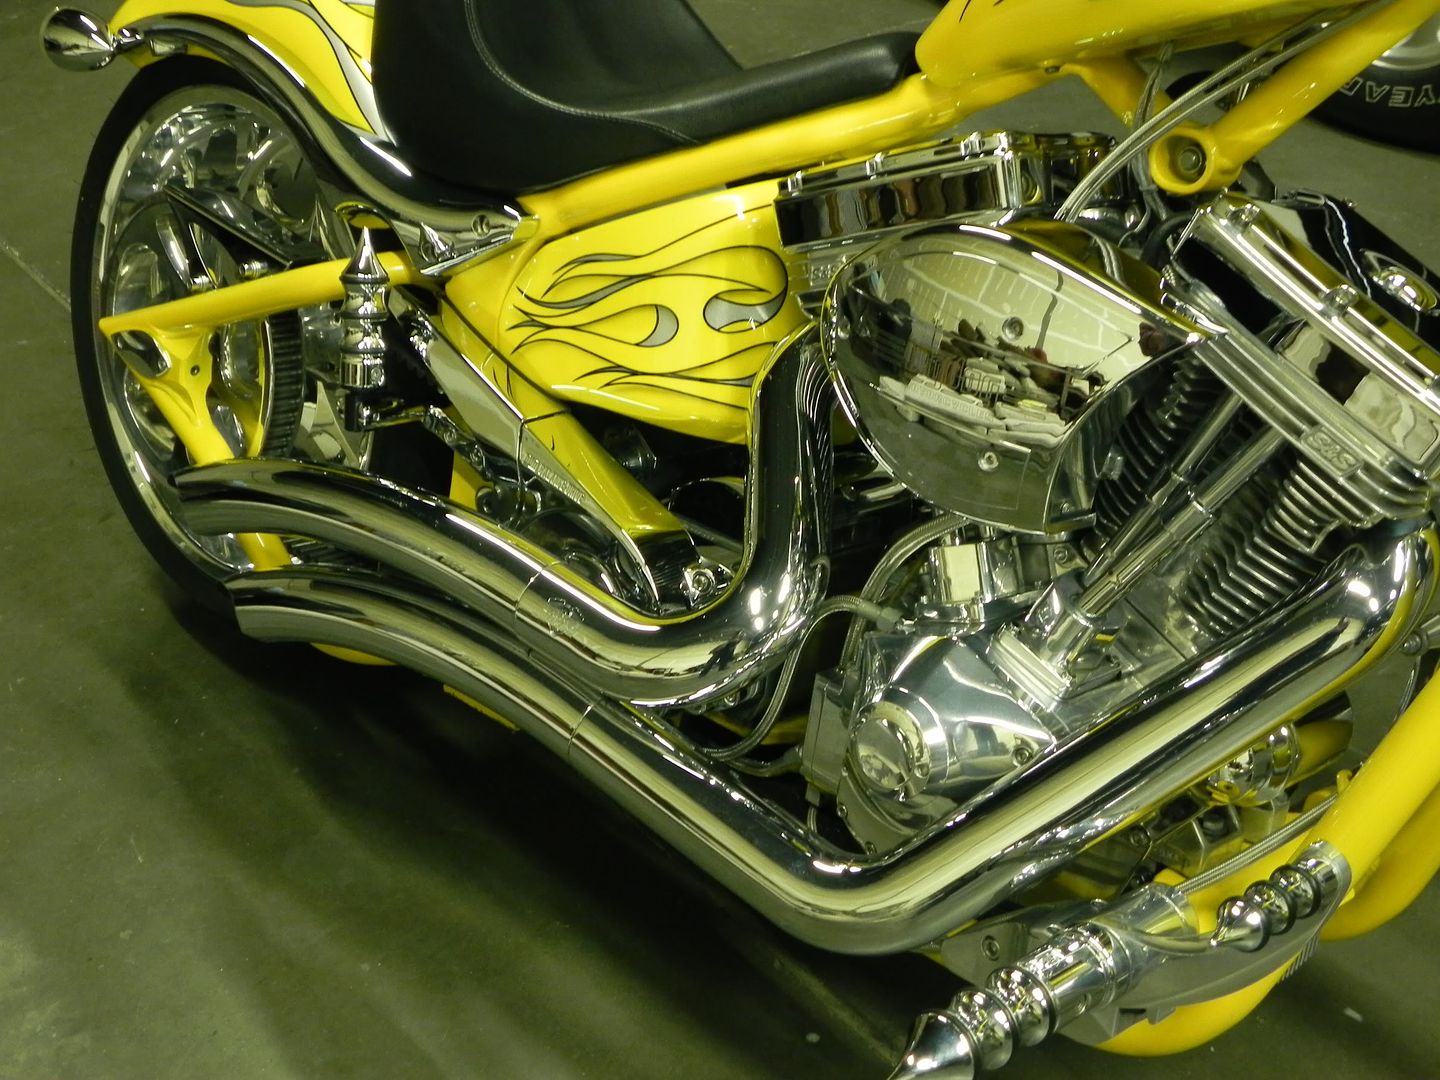
It's tough to photograph chrome indoors. I tried it with a flash, without a flash, from a distance, up close... Anyway, it was shiny. 
Elite Status
Subscribe To
Print or PDF

Obsessive Compulsive Detailing
I'm on Thumbtack now! Do you ever use that service? I've found it is a great way to find local tradesmen who can do for you that which you either don't have the time or skill for yourself.
There are a lot of detailers out there who are not very good at what they do. Plain and simple. I've spent over a decade making a name for myself in this area with my client circles and I know I'm a cut above the rest. Most guys look at it as a job that they have to go to. I look at it as a passion that I love to do! This isn't work for me and I love the opportunity I've had to work on some of the cars I've been able to work on. You can see some examples of that in the slide show below. I love what Thumbtack is providing to an industry like mine where people can look for competent and skilled laborers to provide unique and valuable services. Hopefully I'll be selected one or two times and increase my client base even further!
by OCDetails
September is the last good month of the year for a lot of us. October comes and it is raining every other day and the temperature just fluctuates too much. In my case I usually get snow by the end of the month and November is just as bad. September is when I start the Winter Detailing prep work for my vehicles. In fact, from September through May I am closed for any and all new business for detailing. Only my loyal regulars get work done since the work usually takes longer and I can't stack as many cars in one day as when it is just a summer maintenance type deal. Winter detail prep is something that is best done in September when the weather is still nice and winter is just right around the corner.
Here are a few things to consider for your winterization of your daily driver this season.
-Wheels: I like to take the wheels off and put a coat of sealant on them. It gives me a chance to scrub them good and hard and get them really clean before they are pounded by months of neglect while being covered in salt. My sealant of choice is Klasse simply because of how durable it is. You can use any sealant you have handy. Just avoid the waxes. They just don't last very long. Chances are it won't last through September if you did it now, so skip the wax and go for a sealant.
-Paint: The Fall Detail means clay bar, polish, and sealant. Get the tree sap off and get rid of the swirls by claying and polishing the paint. Then get a good sealant on there to protect it from the salt and grossness of what is going to be slung up by your tires over the next few months. If you are using Klasse then I recommend at least 3 coats over a period of a few days for maximum shine and protection. In fact, with any sealant I would absolutely recommend more than one coat. Unlike a wax, which just blends layers together when you apply them, sealants cure on the surface and can be layered. Most sealants require 24 hours of cure time between coats, but some include a cure accelerator in them which eliminates the cure time. Wolfgang and 4*Ultimate are a couple of those sealants. I'm not sure about the new Meguiar's Ultimate Liquid Wax. I'd give it a day between coats just to be on the safe side.
Windows: Don't use paint products on your windows. There are products like RainX and Aquapel out there for a reason. Coat your glass with them to create a surface where water beads up and zips off from when you are driving. A fresh coat of RainX will even cause your windows to freeze at lower temperatures. I did a test once to try and demo an ice scraper and I couldn't get my windows to freeze overnight to save my life. I don't know if it was just super dry or what, but it wouldn't work. I had to spray water on the glass with a spray bottle and try to demonstrate it that way, but it just froze into little beads of ice. Glass treatments are awesome in the winter.
Exterior trim: Wolfgang has a new trim sealant that I'm dying to try out this winter. Right now there isn't anything i've found to avoid the salt stains and just generally nasty look that areas like the wiper cowl and step guards on vehicles get during the winter. I'll be hopefully picking a bottle of this up soon and will let you know. For now I can just suggest you keep them protected with a good product like Aerospace 303.
Tires: Yeah, not much you can do there either. Just keep em clean when you can and shine them up if you get a chance and there is a break in the weather. I typically don't do much for my tires during the winter because nothing really helps which is out there right now.
Carpets: They get nasty with salt in the winter and I don't know what to tell you. Get winter mats if you can, but otherwise just keep your mats clean by vacuuming them when you get a chance and kicking the snow off your feet before getting in. Your washing machine is your friend. Throw your mats in there every couple months and they'll stay looking a lot cleaner. I know someone who puts packing tape around the edges of his mats in the winter since those areas are the hardest to clean. Not a bad idea... Not pretty, but better than having salt encrusted borders on your floor mats.
Leather: Winter doesn't really affect leather, but it does affect leather conditioner. When the leather is frozen you can't get the conditioner to soak in. It is best to condition your leather when the conditioner is warmed up and your car is warmed up. Don't try doing that in temperatures below 40 or you'll just waste product and make a mess.
There are a few products you may want to bring in from the garage during the winter. Your sealants will probably be fine, and your waxes will be even better. Since tire shine doesn't work when it is cold, you might want to bring that in though. In fact, anything meant to clean anything should be brought indoors. Freezing does something funny to cleaners. Other than that, you shouldn't have to worry much.
Oh, don't forget to polish your exhaust tips. It likely won't get done for the next four or five months, so you might as well start out with a clean one. A little chrome polish, or even paint polish, and a rag will do wonders. You can use paint sealant on them afterwards, but the heat will probably vaporize it after not long. Your best bet is just to stay on top of it. A little glass cleaner and a towel will do the trick if you stay on top of it.
Hopefully this has been of some use. I know not everybody is as nutty as I am about car care, but my cars are among the top five most expensive things I've ever bought in my life, so they sort of fit high on the priority list of taking care of them. ;) Unless your car was given to you, then you are probably in the same boat. I don't know many things other than your house and your education that you are going to drop twenty or thirty thousand dollars on and use every single day. I will say that your vehicle represents an investment of money, and if you want to see as much of that investment come back to you someday when you sell it, then caring for it in this way is a great idea. :)
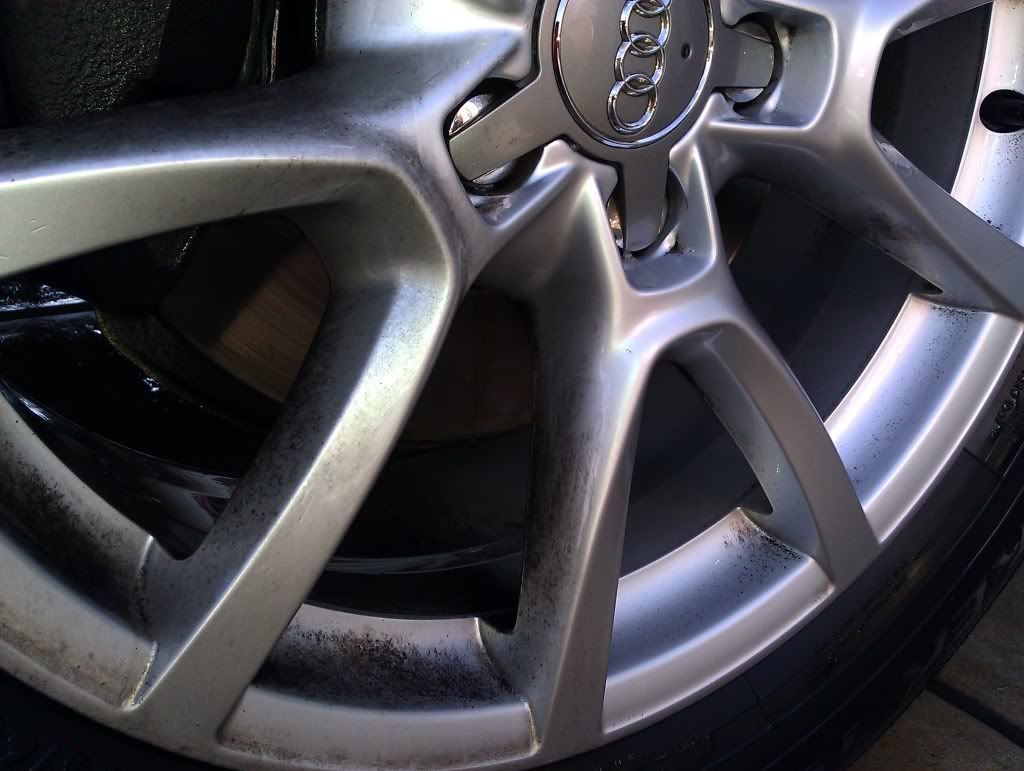
I think some of you have seen the wheel brush I use and know my process. I just wanted to show off some of the results since wheel cleaning is kind of a chore that none of us like to do. However, it is also the first thing I look at when buying a used car. If the wheels are pitted and corroded, then I can be pretty sure that the rest of the car was neglected as well. There is no reason to believe they took the time to clay and polish their car if they were content with brake dust coating their rims and eating them up. 
So this is a relatively new Audi Q5. Not a bad little vehicle really. The problem with nearly all German vehicles is the brake dust though, so I’d have to really have a good reason to buy an Audi, BMW, Mercedes, or Porsche. They are great cars and all, but if I have to scrape brake dust off every week, then I’m afraid that takes away from the sexiness for me. I’m not into high maintenance women and definitely not into high maintenance vehicles.
The first thing I did was spray them down with Eagle One A 2 Z. That is my favorite wheel cleaner. It does a great job of getting brake dust off tires and wheels. However, there is only so much that can do. What it did here was get the top layer off, but it still left a lot on it. I should have taken a before and after picture, but let’s just say not much came off. Mostly just the surface stuff from the past couple days and a lot of junk on the tires. The rest had to be scrubbed off.
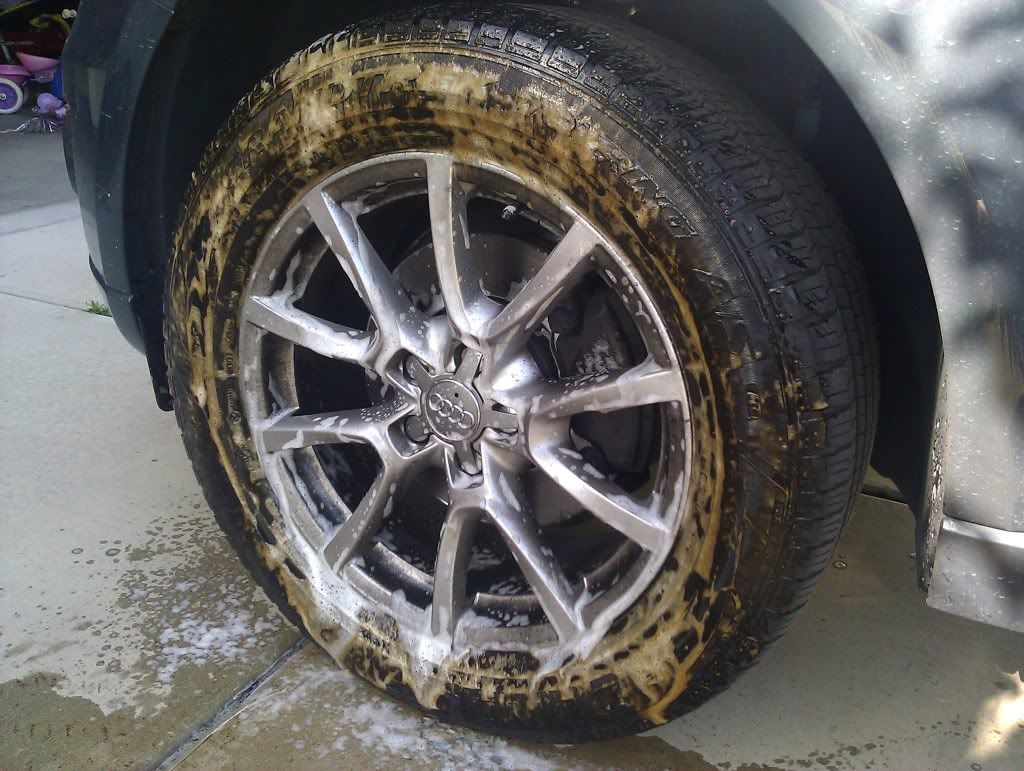
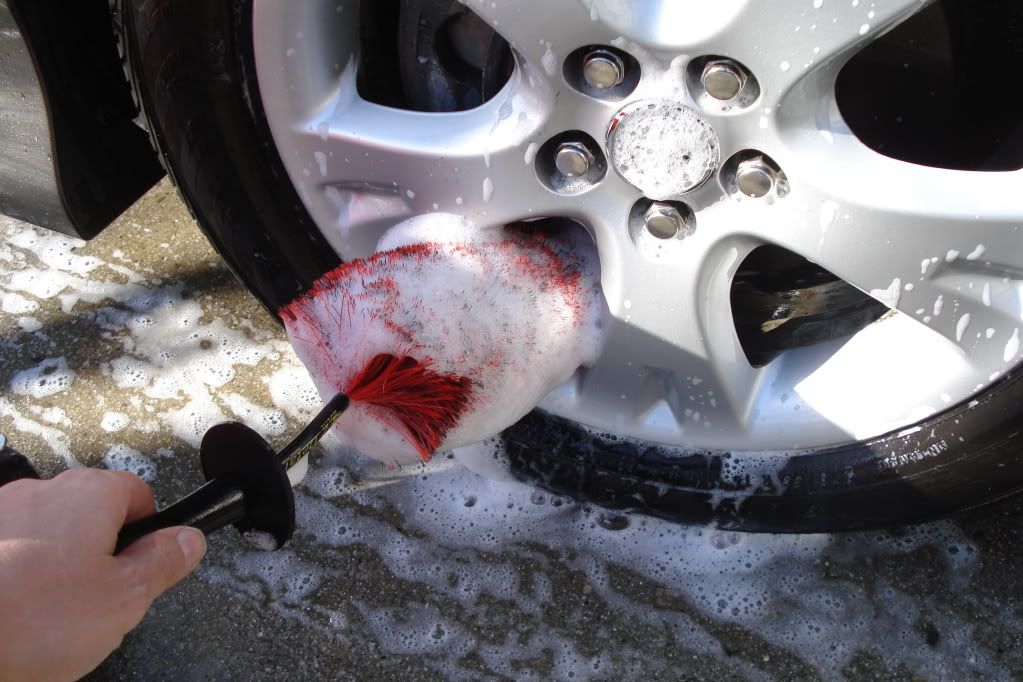
Look at how black the inside of that rim is. It is just nasty. The whole thing is nasty. This product will get a lot of it off the spokes, but the lip and that ledge inside of it before you get to the inner part of the wheel is where the brake dust does the most damage. There was crap on this wheel which I was not going to spend all day scrubbing at just so it could be neglected again, but with a little extra elbow grease and a nice wheel brush, I got it looking like this:
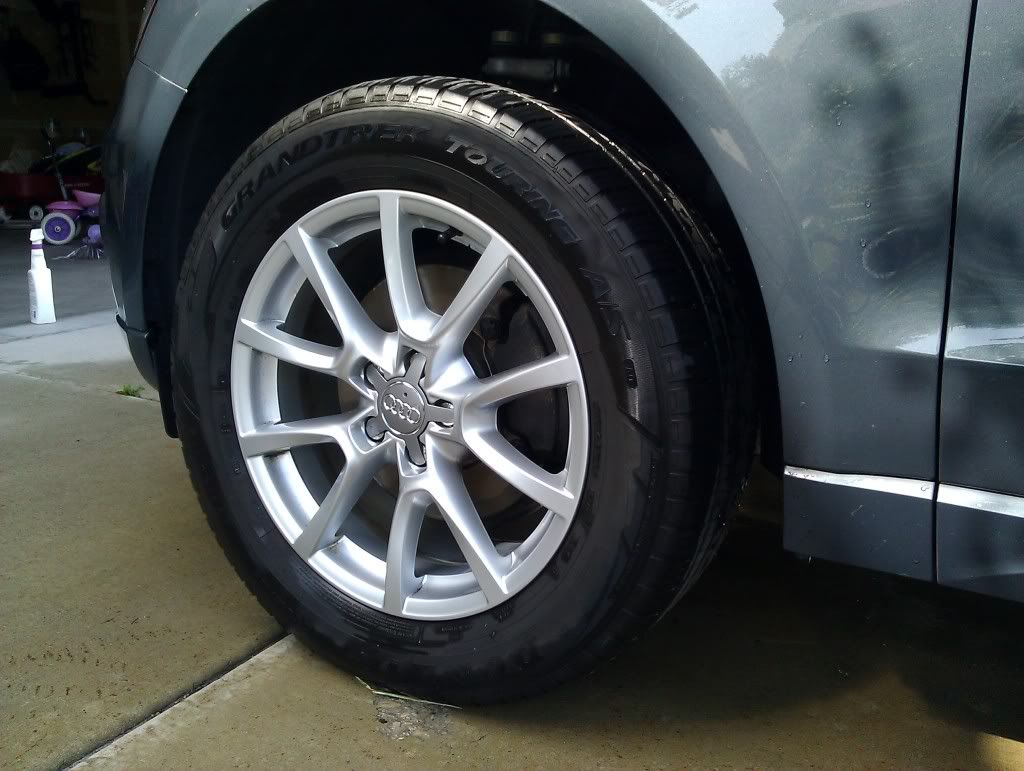
The magic there was not in relying on the wheel cleaner to do all my work for me. After I washed the rest of the car, I used the bucket of water to go to work on the wheels. Obviously you don’t want to do it before you wash the car or else you’d be doing it with black water. So I took my handy dandy wheel brush I got from Autogeek at SEMA a couple years ago and went to town scrubbing.
Since the brake dust on these wheels hadn’t really had time to do serious damage, most of it came off pretty quick. I just jammed the brush in between the spokes and scrubbed the inside of the wheel. I treated it just like I was brushing teeth when it came to the lip. Scrub scrub scrub… rinse… repeat…. I use a combination of a couple brushes for this kind of thing. One is a Meguiar’s brush, but it works better for large flat faced wheels like the ones on my Corolla.
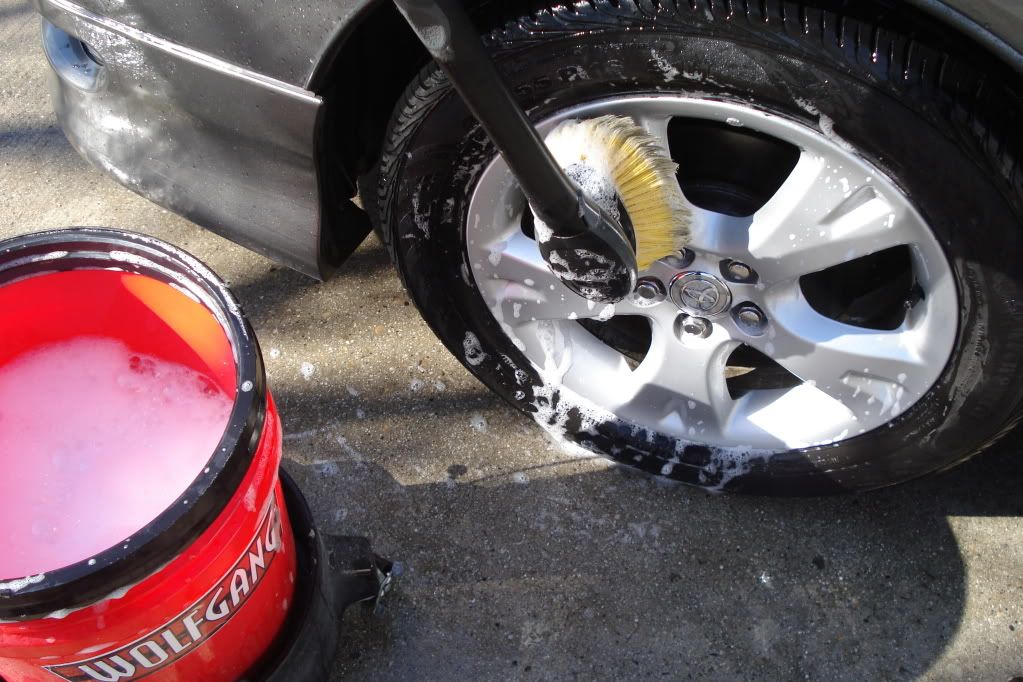
For this job I used the Daytona Speed Master Wheel Brush. To take a page out of my most recent detailing guide, here are some process pictures on my car.

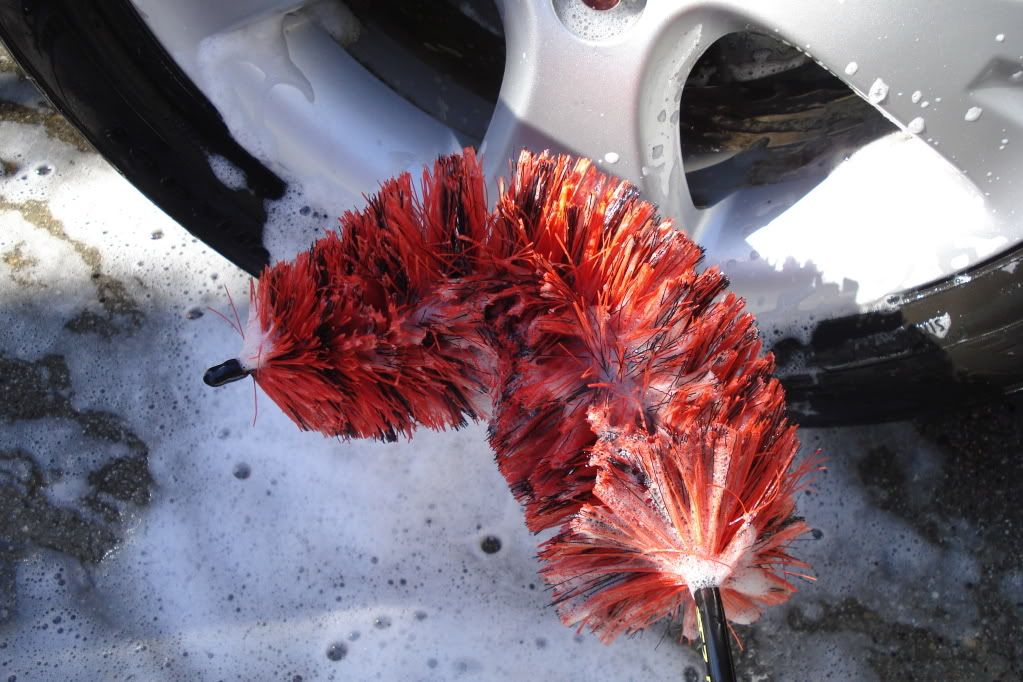

That brush does an awesome job and is totally safe on your wheels. The wire that the bristles attach to is wrapped in thick rubber and no metal touches your wheel. I’ve bent this thing back and forth so many times over the last two or three years that you’d think it would have broken by now, but it hasn’t. It is an awesome brush. There are a couple similar models out there on the shelves, but my problem with them has been that they don’t wrap the wire with rubber and they also break pretty easily. So just be picky when shopping for one.
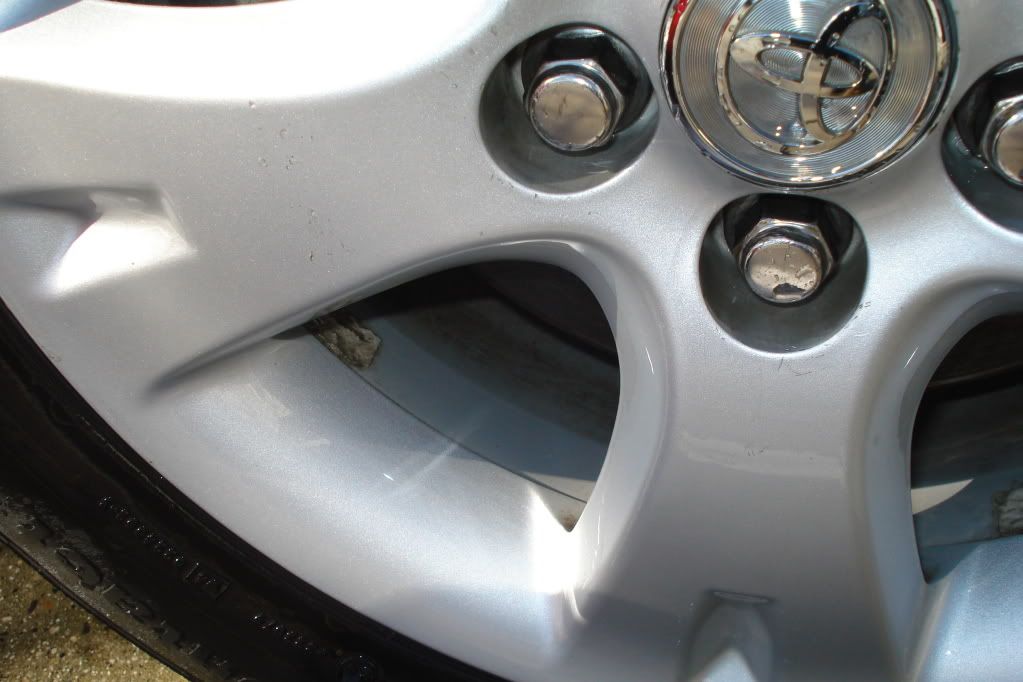
On this particular Audi I want to show you what it looked like with just a quick scrubbing on the passenger side front wheel. The right side was just a quick scrubbing, but you can totally see how much better right side of the inner part of that wheel looks in comparison to the left side.
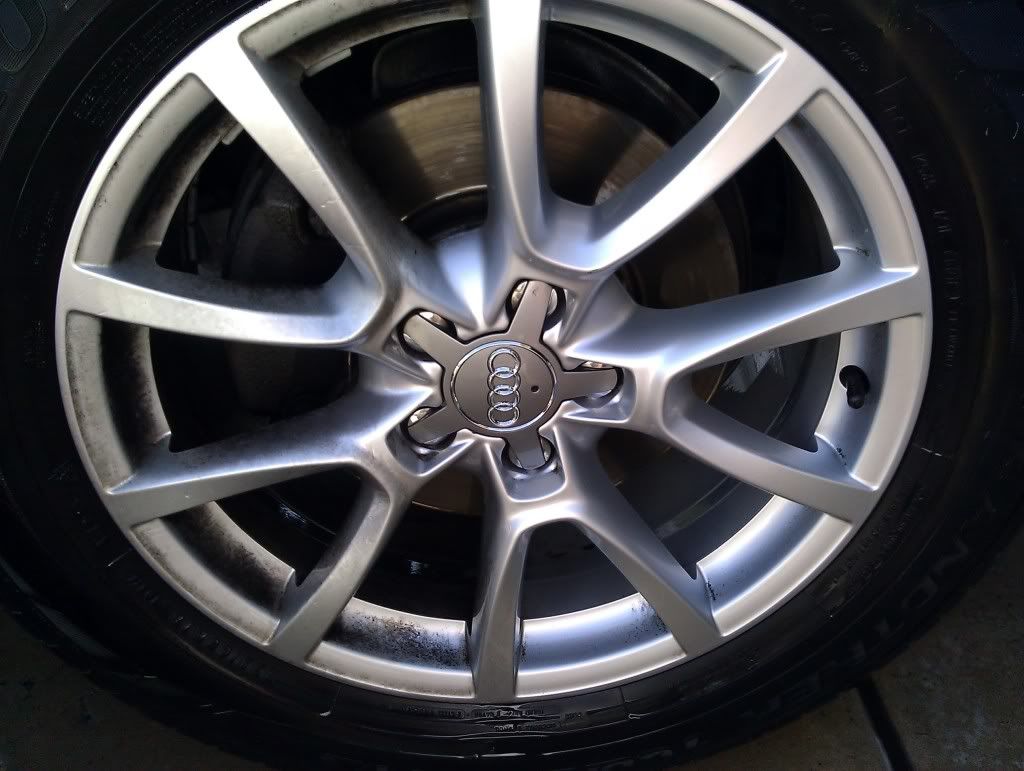
You can also see the parts which require a little more effort which are left, but that is what you get when you have a German car. Using the Meguiar’s brush worked out really well on those parts, so ultimately the wheels turned out pretty good. The back ones weren’t so bad, but here is the before and after one of the rear wheels on the Audi:
Before:

After:
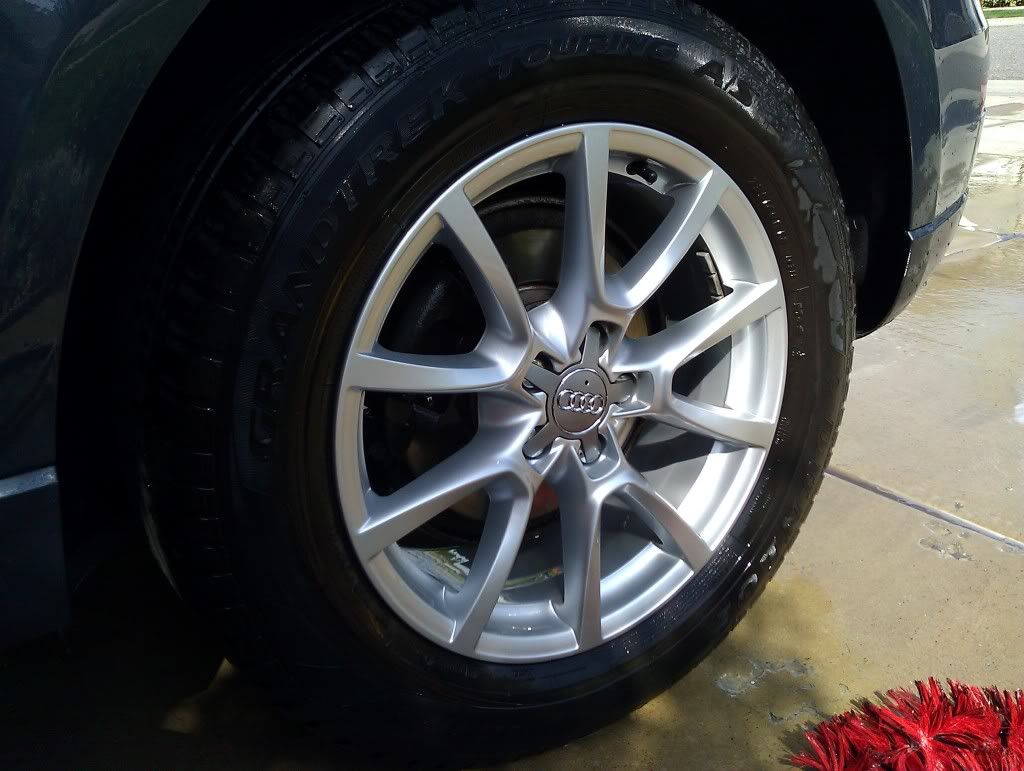
So get yourself a good wheel brush and stay on top of them if you have a lot of brake dust. I’ve found NOTHING which really keeps it off, but I can tell you that putting a sealant on them does help make them easier to clean. Waxing doesn’t really help because it just gets too hot and it vaporizes in a couple days. Wheel Waxes don’t really help either. I’ve used sprays, jellies, waxes, sealants, voodoo, and everything else I can think of. The only thing that works is cleaning them regularly. Let me know if you find anything else that really works because I’ve been stumped. Fortunately I don’t buy cars with this problem, so I haven’t had to deal with it much. I do still maintain my rims though because I know if I make judgments about car care based on their condition, then it is likely that others do as well. I do intent on selling my vehicles at some point, so keeping them looking good is a high priority for me.
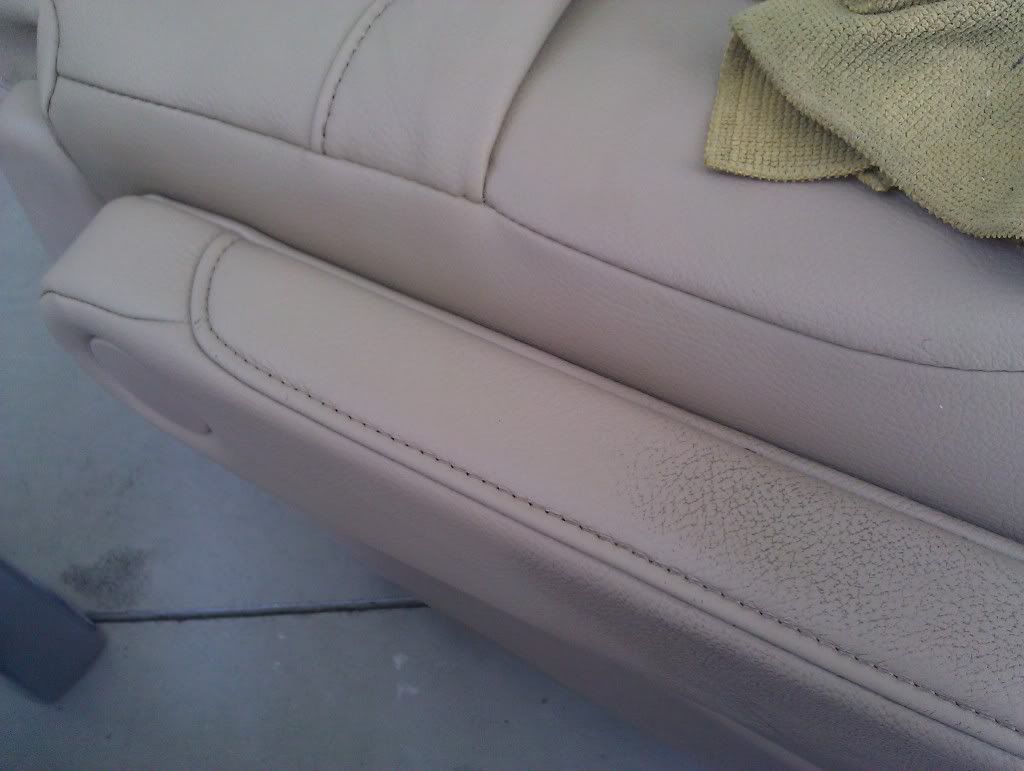
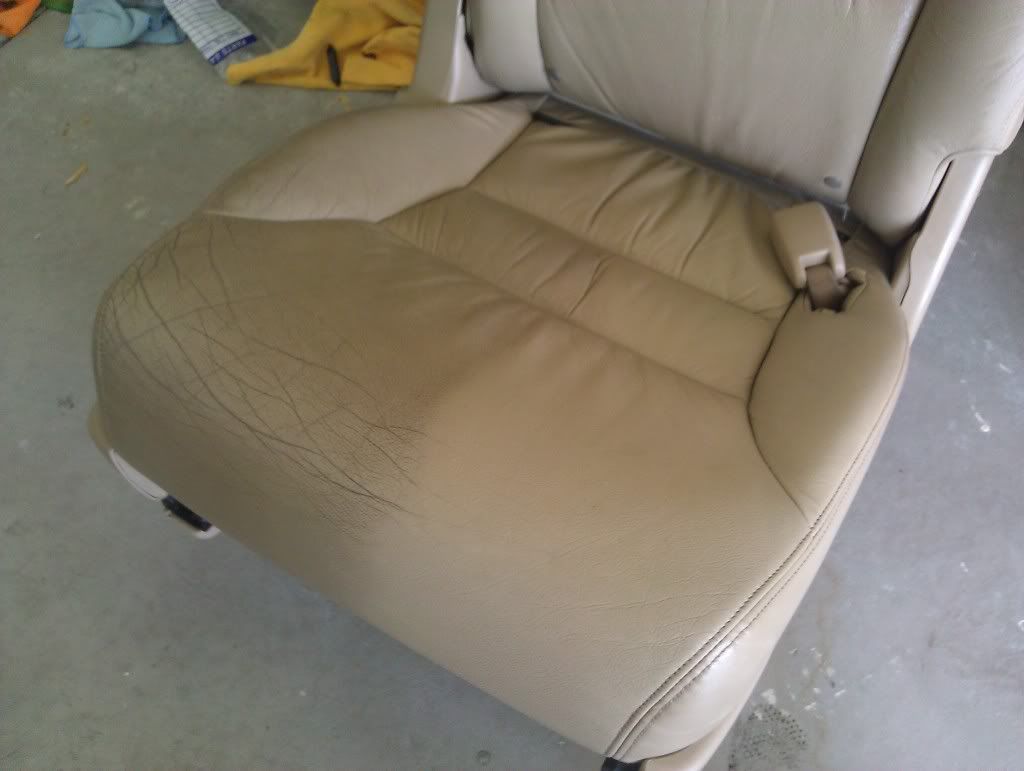
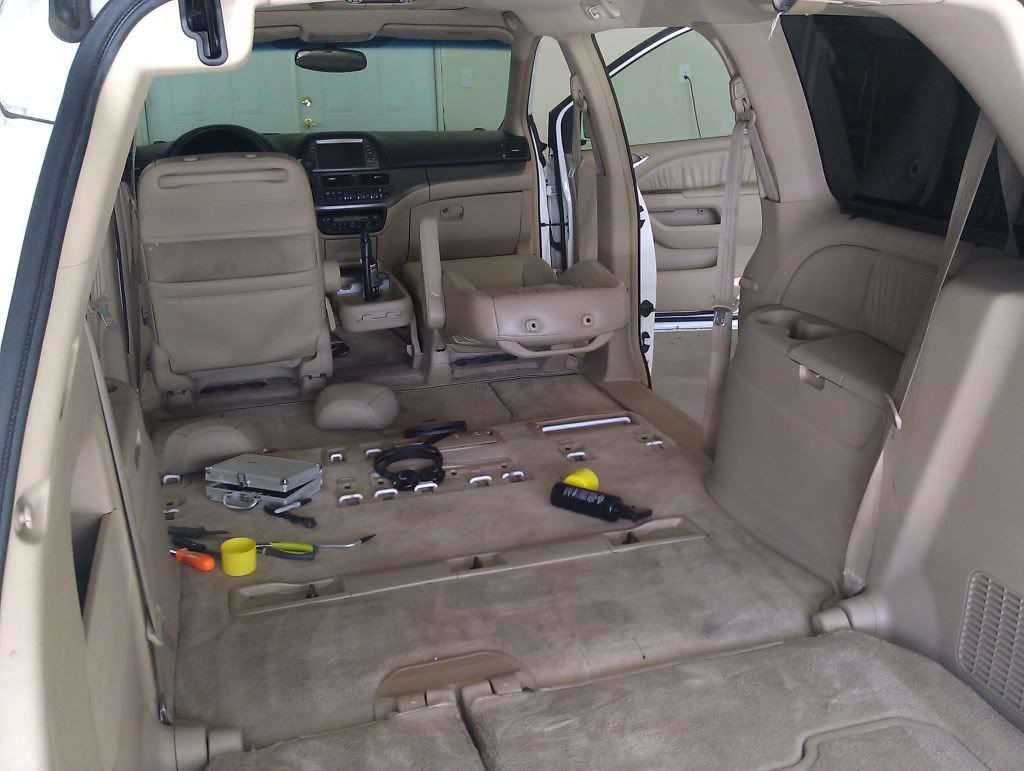
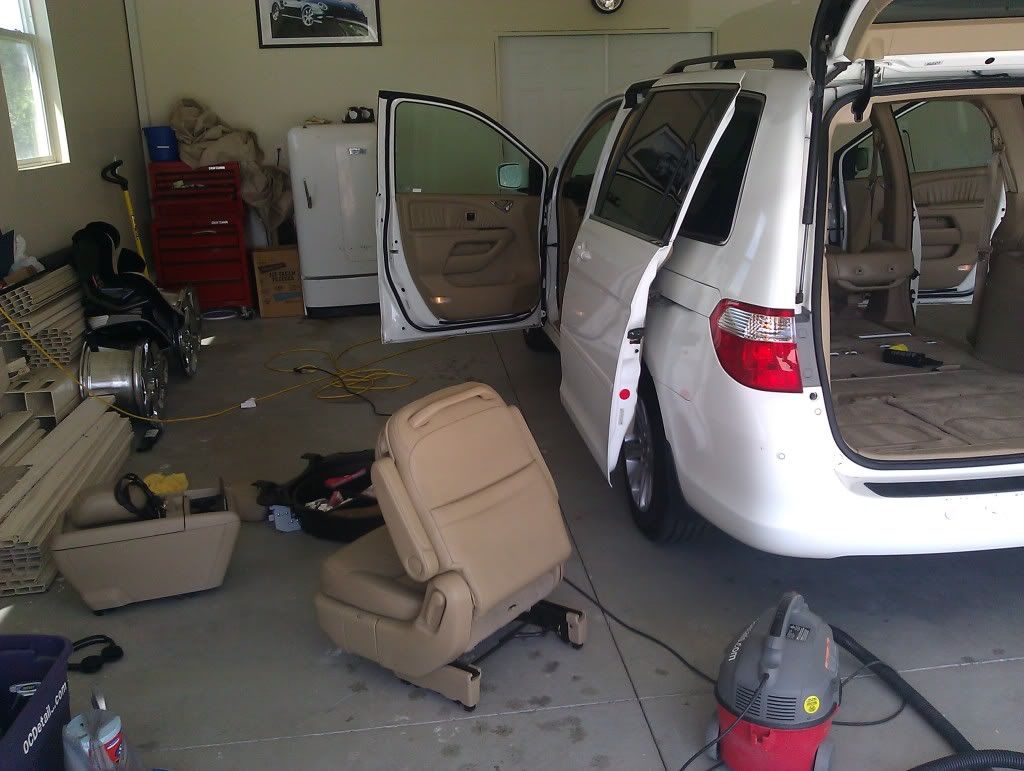
I did some grizzly cleaning on a Honda Odyssey this weekend. The thing hadn’t been really cleaned beyond just vacuuming for something like 6 years. This is exactly the reason I won’t ever have tan, beige, white, brown, or any other color of leather in my car other than black, dark grey, charcoal, or something like that. Light colored interiors are just a nightmare to keep clean and they take forever when you do need to clean them. It wasn’t as hammered as some vans I’ve done have been. The kids going in and out of this did a good job of not spraying soda all over the ceiling or having the family zoo shed their fur in it every day, so the bulk of the cleaning was on the hard surfaces and the leather.
For the leather I used the Wolfgang Leather Cleaner and then ultimately the conditioner. I’ve found for really dirty seats it is best to use something which is dedicated to cleaning to get the best results, otherwise I would have used something like Poorboy’s Leather Stuff. That works really well too. This van was being repurposed to be used as a shuttle for clients to and from the hangar with their private plane, so I really wanted it to look its best.
The process as just a lot of elbow grease. I used a carpet brush with nylon bristles that really do a great job on getting in the grain of leather seats and getting the dirt out without damaging it. I wouldn’t suggest just any carpet brush for this kind of work though. You’ll see the one I’m talking about down there with the side rails. Anyway, spray the cleaner on the seats, let it soak just for a second, and then brush it out using circular movements. That is really the key. Scrubbing back and forth doesn’t get nearly the result that circles get you. It is the same advice your dentist will give you about brushing your teeth, actually.
I did wipe the seats down with Meguiar’s Interior Detailer real fast before applying the conditioner just to make sure I got all the streaks and the grain was really clean. The difference was night and day. If I had brought a good camera with a flash then I would have taken pictures of the interior before I took it all apart and cleaned it and then after I put it all back together. It didn’t even look like the same van. But the purpose of this is just to talk about cleaning a couple of the surfaces, so here are the seat pictures.
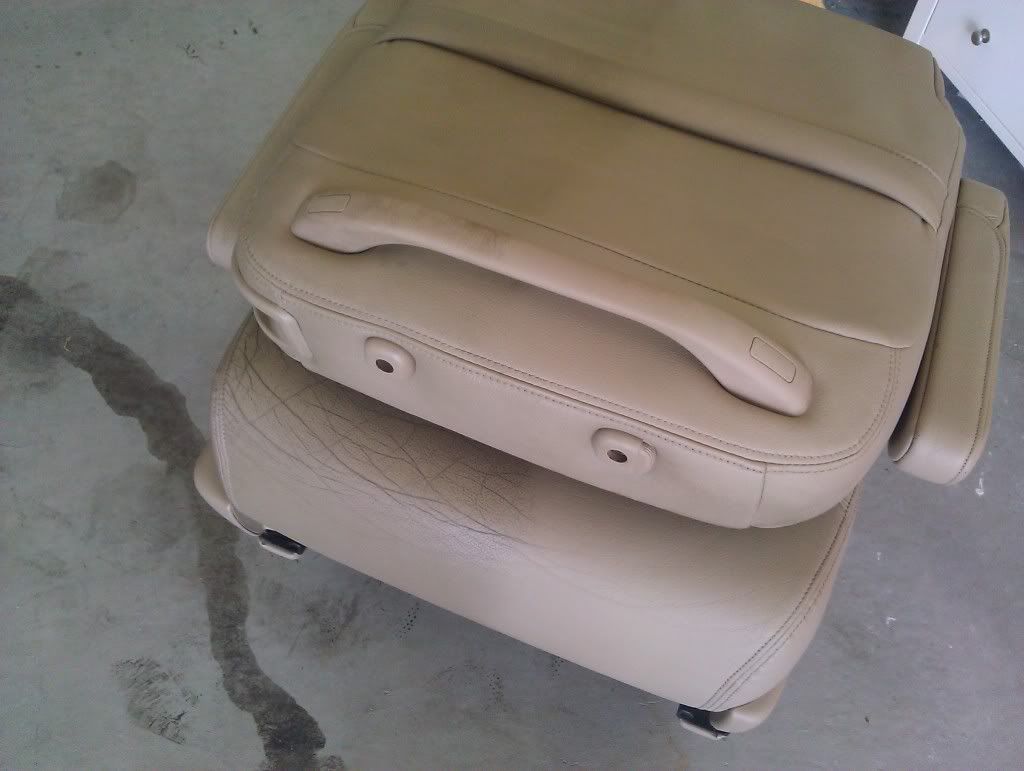
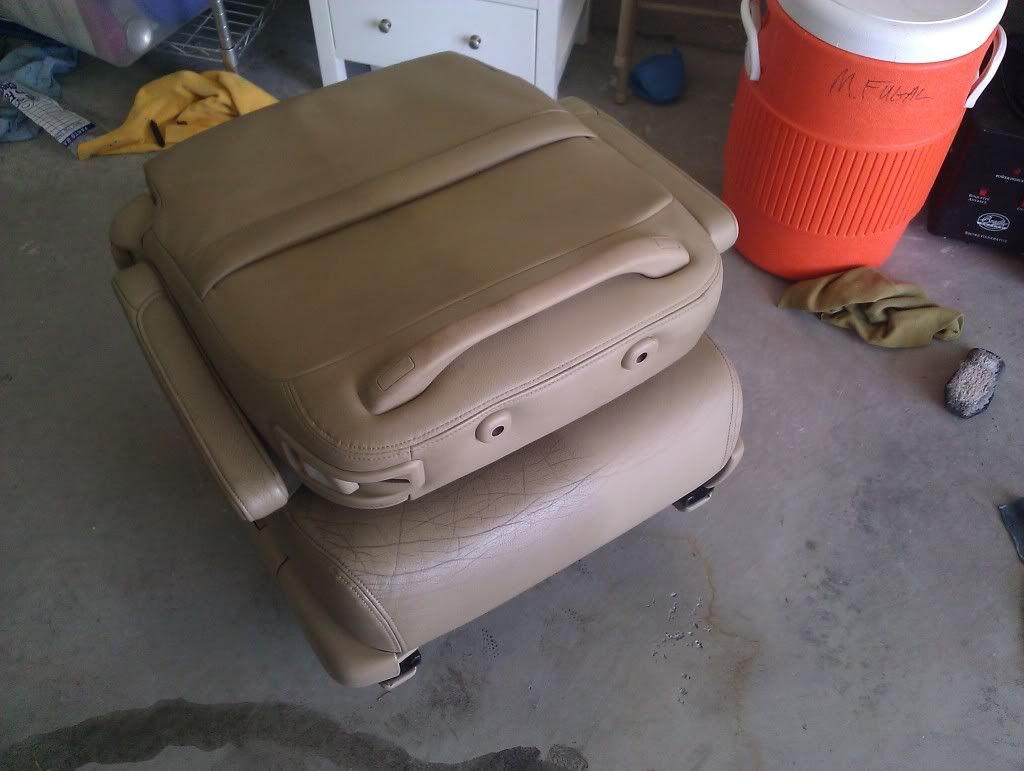
Taking the seats out is obviously the best way to clean them. Anytime that is an option for you I would highly recommend it. Especially in a van where getting them out it easy. For a van it is even more important because you’ll want to have access to the plastic covers over the anchor points for the seats anyway.
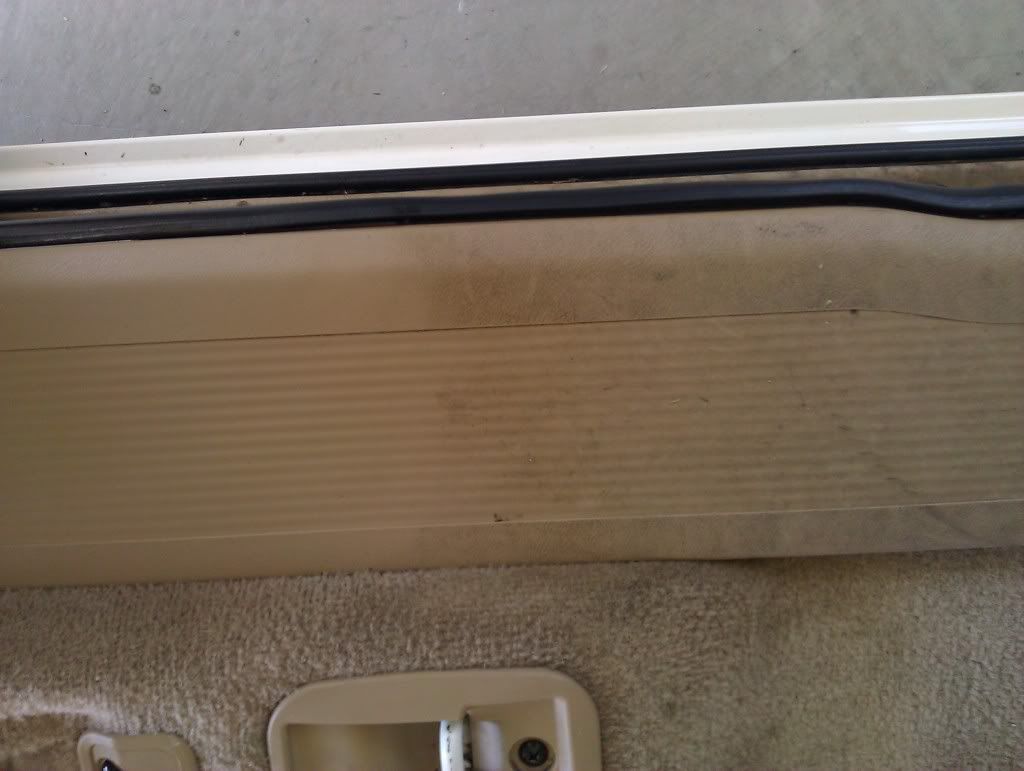
The side rails where you step in were also a mess. Typical for this color, actually. Cleaning them required using a little elbow grease as well. That and Tuff Stuff. I love that stuff…. It is ridiculously versatile.
Since I’m using the same brush for carpets, plastics, and the seats, it is important that I clean it out to avoid just driving more dirt into whatever I’m trying to clean. I keep some all purpose cleaner and water handy so I can wash it out after each project to keep it clean. Just a tip you might want to consider. Keep your tools clean and you will have less frustration down the road.

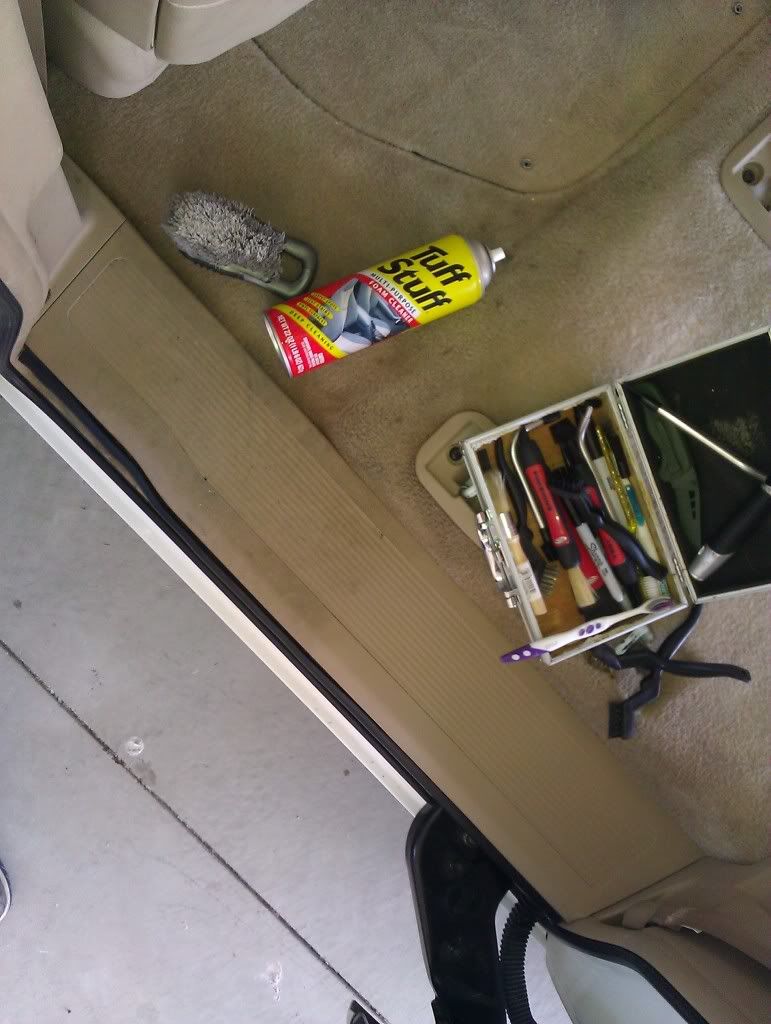
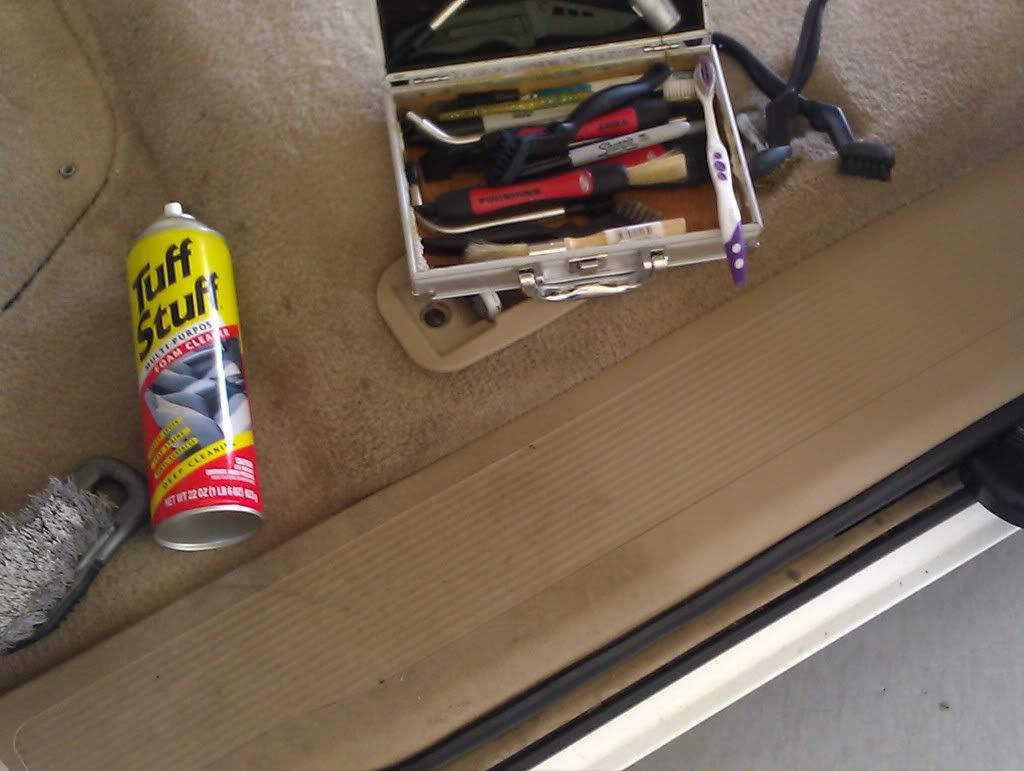
I’ve got a whole case full of interior cleaning tools. Retired tooth brushes, brass and steel brushes, nylon brushes, dusters for vents, all sorts of picks and wedges which are also handy for engine detailing, a couple blades, and a little multi tool with a screw driver and pliers and stuff on it. These tools are ridiculously handy to have around. I bought a really cheap dremel thing several years ago which came in that nifty little case. It has been the best case for interior tools I could have ever imagined. It slides perfectly under the Autogeek detailing bag I have too, so that makes it even better. 
Vans and SUVs can take a ton of time if you do them right. I spent 5 hours on the interior and 2 hours on the exterior of this vehicle. Good thing it was white or it would have taken longer. Because of the color inside it just took extra time because every piece of dirt shows. On a darker interior you may not get it quite as clean because you just can’t see the dirt you are leaving behind. That saves you time, but it doesn’t mean the vehicle is clean. I have an Odyssey myself and it takes me just as long to detail it when I do my yearly full on cleaning. My rule is to clean it as if it was as dirty as you can imagine it is even if you can’t see the dirt. You know it is there, so clean it anyway. Find a process and stick to it regardless of whether or not you can see the dirt. If you haven’t cleaned your leather seats in a couple years and they just don’t look that dirty, clean them as if they were anyway. They probably are filthy, but you have just been too close to the forest to see the trees. Many people don’t realize their leather is getting this dirty because the change has been so gradual that they didn’t notice I’ll tell you that when the owner saw the difference on this van, he was absolutely shocked at how dirty it had been. He didn’t even realize it had gotten so bad. So get some good tools and clean em up!
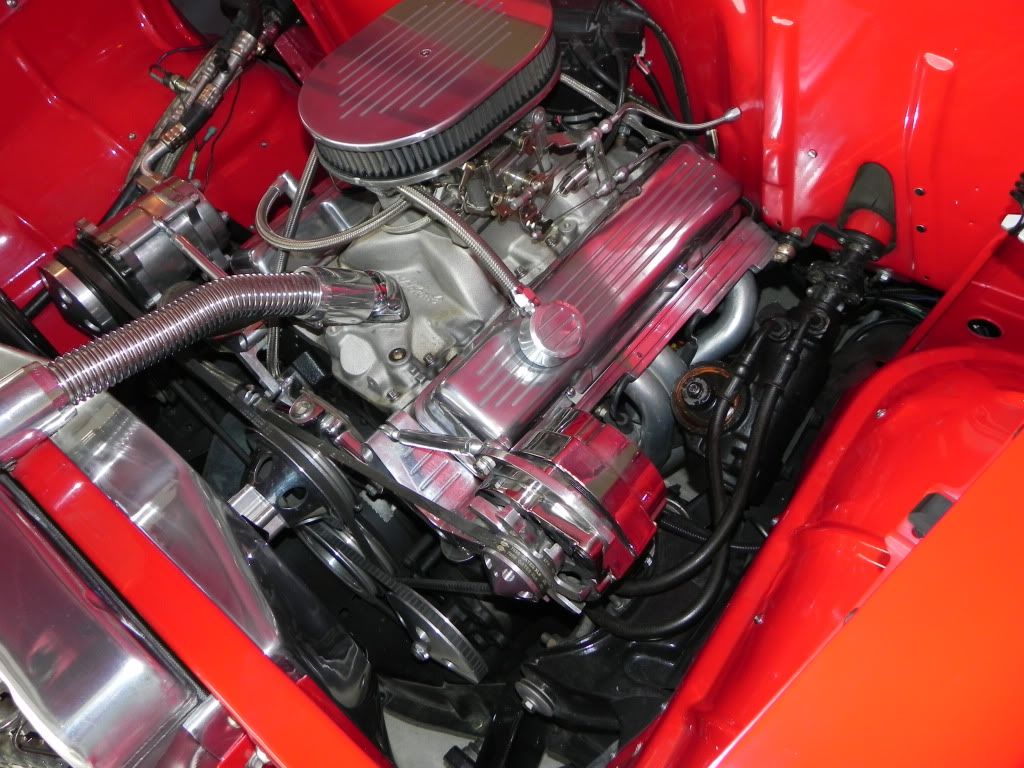
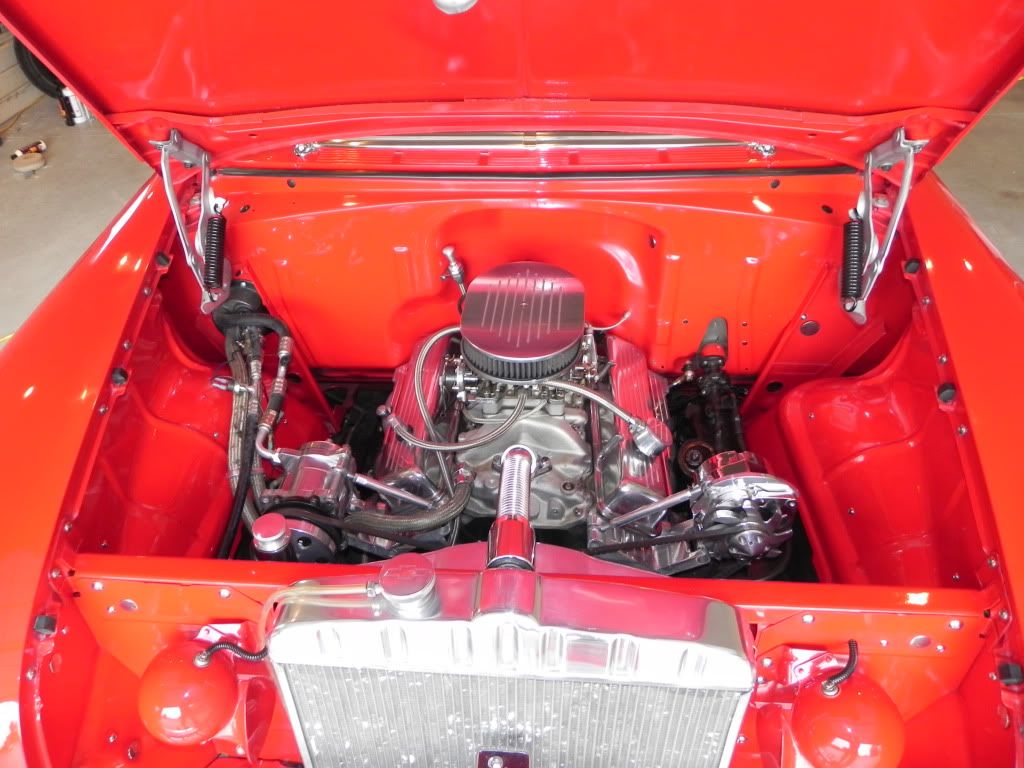
This was under a car cover in the garage of a recent new client. I was working on another car for him and took a peek under the cover. It was in pretty good shape, but it was clear that the paint was oxidizing and it had some work that could be done. Especially on the aluminum under the hood. The before pictures really didn't show much since it was already looking pretty good, but I got a couple that show the problems.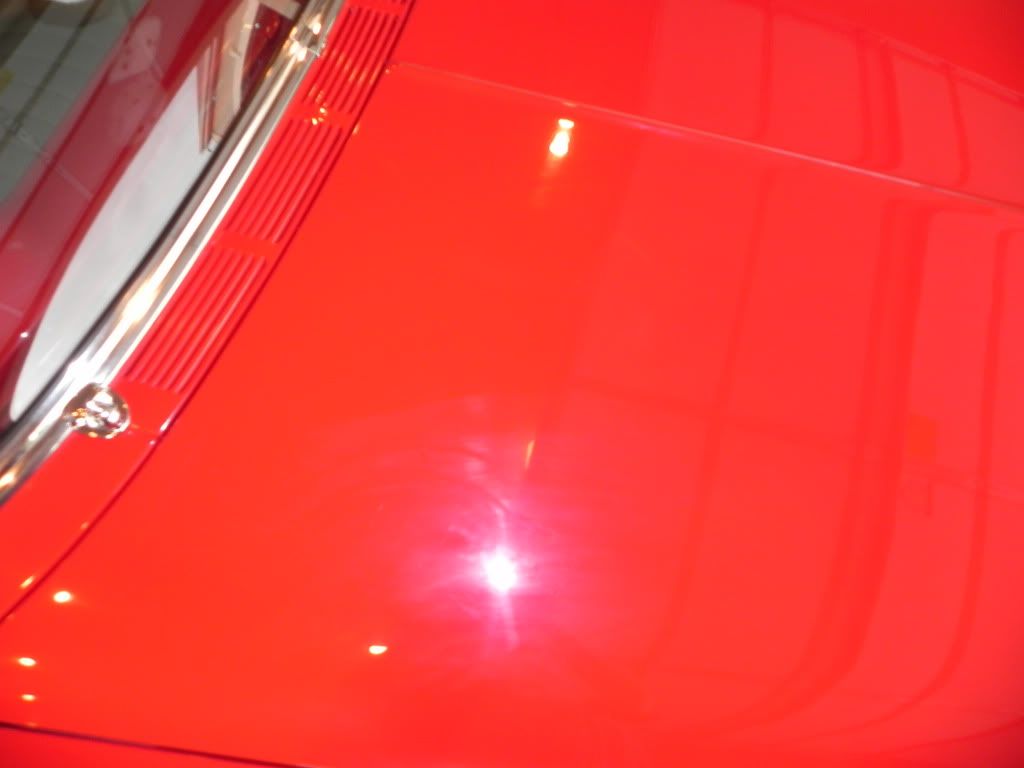
I hit it with the new Meguiar's Ultimate compound I picked up at AutoZone. That polish is a great choice for people looking for a good cutting compound off the shelf. It definitely did the trick on the oxidation. And I used the Wolfgang Metalwerks products to polish up the aluminum to a mirror shine. I really wish I had taken before pictures of that. It was dull and non reflective. Now it shines like new!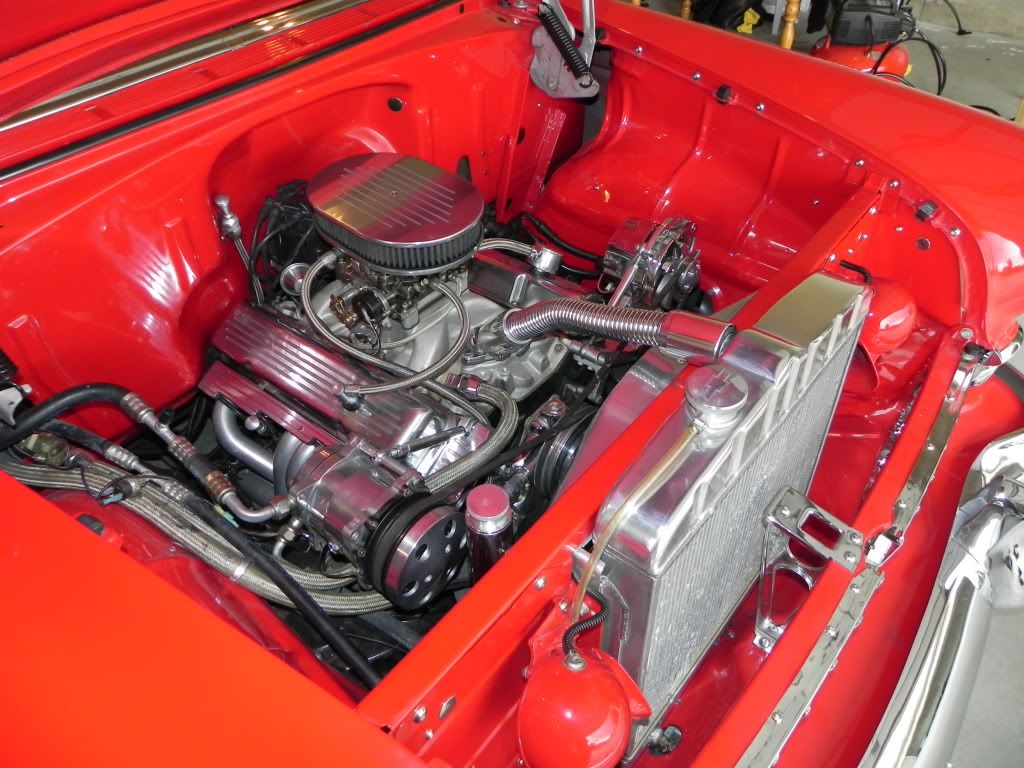
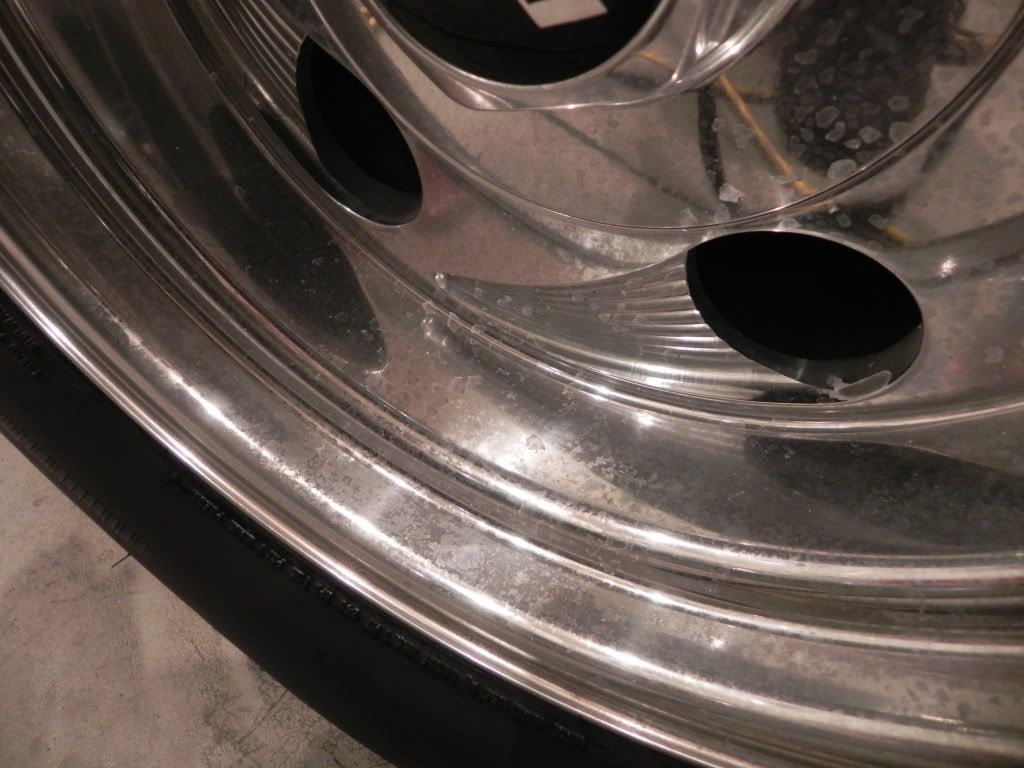
Same process on the wheels.
before: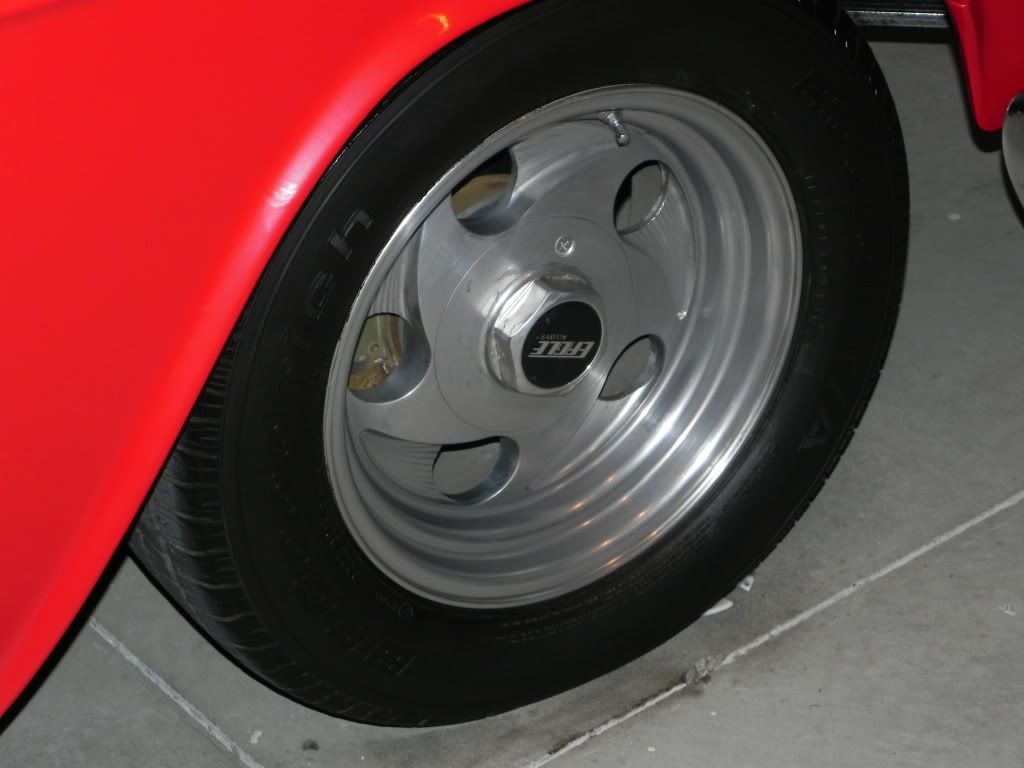
after: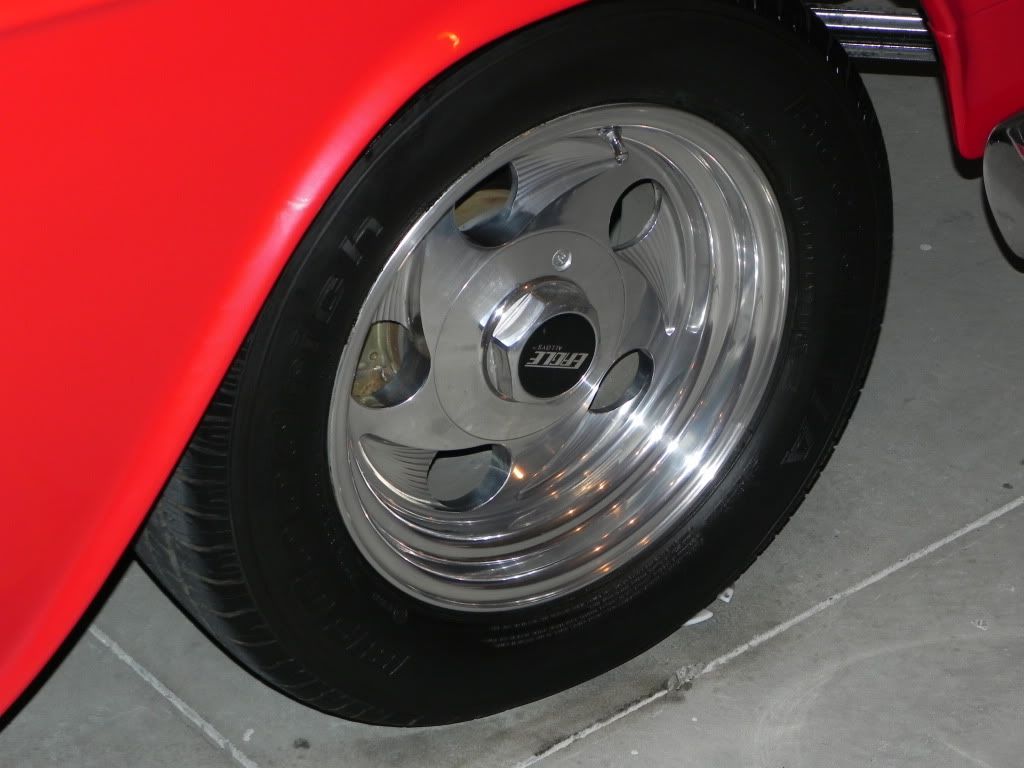
The owner was really happy with the finished result.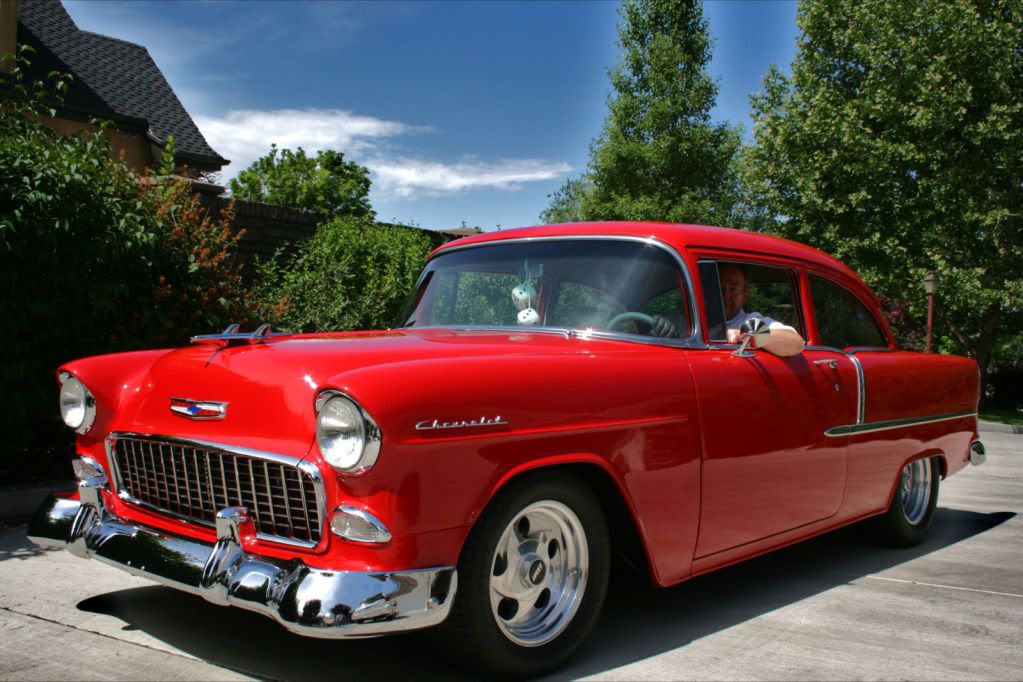
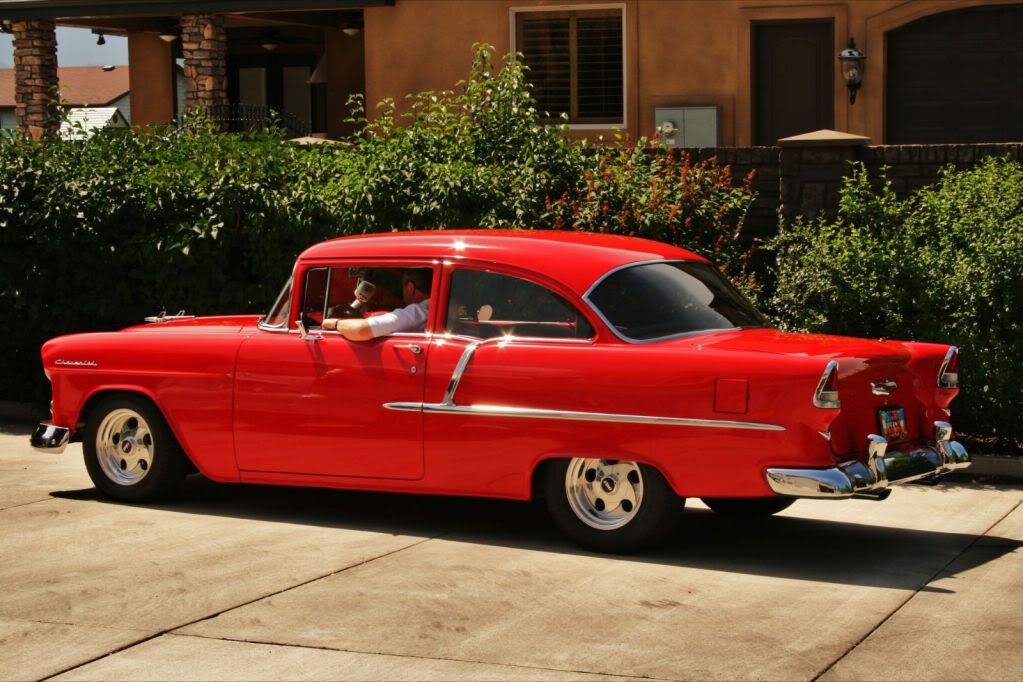
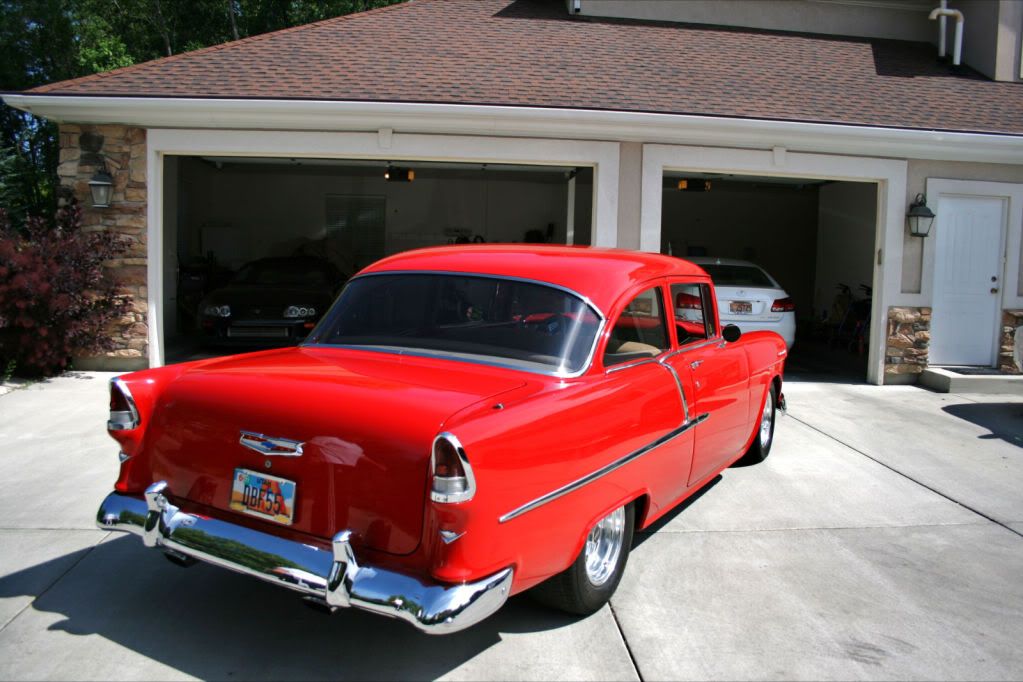
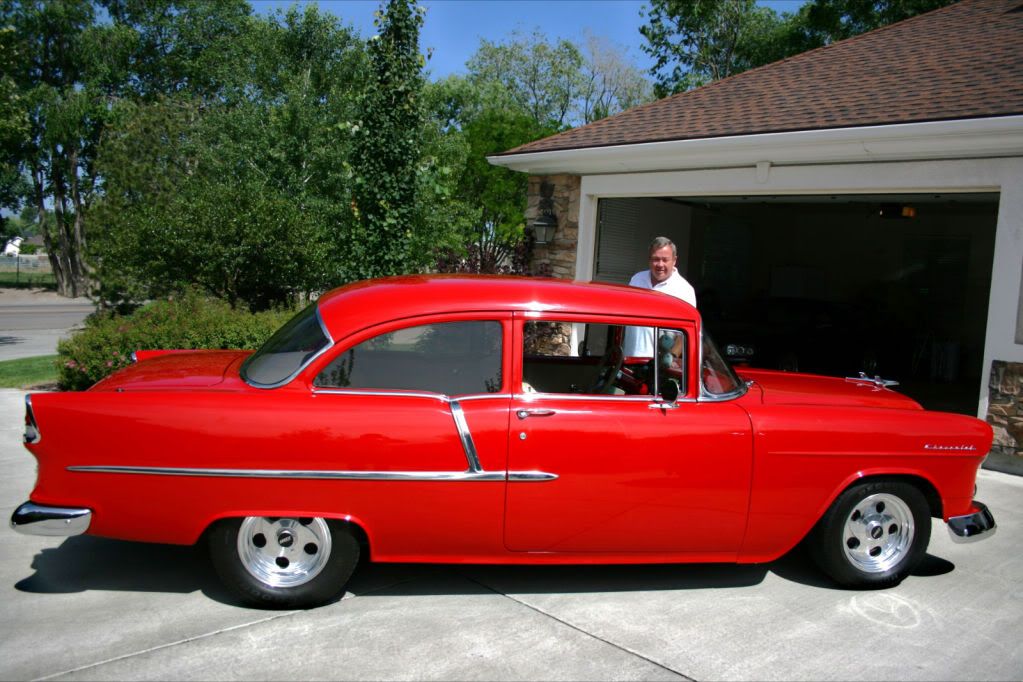
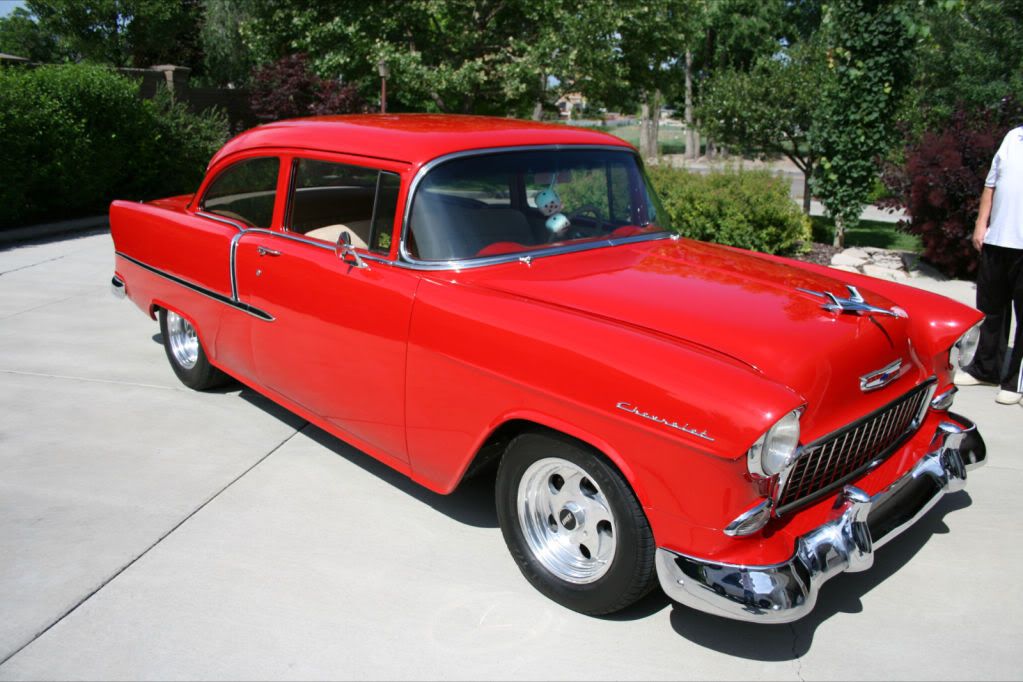
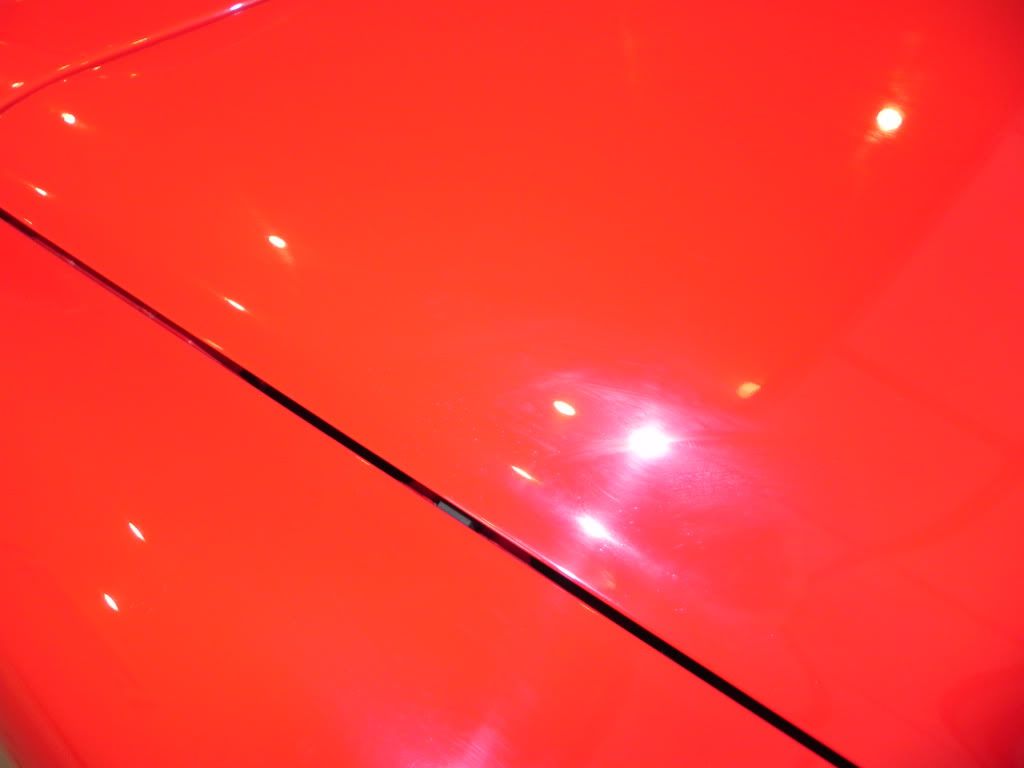
Lots of chrome to polish, but it came out looking great! Gotta love Wolfgang on red!